How to Use WordPress Widgets in the Sidebar
Using WordPress widgets in your sidebar is probably one of the simplest tasks you have to accomplish in order to build your website and improve its functionality, as well. Widgets can allow you to make your website more visual and add relevant content to increase your visibility and allow visitors to navigate effortlessly on your pages. Furthermore, the sidebar is present on every page of your website, containing those specific widgets you will add. If you are not knowledgeable with using the functions of the WordPress platform, you can easily learn how to use widgets in your sidebar by following the step-by-step guide below.
Step 1
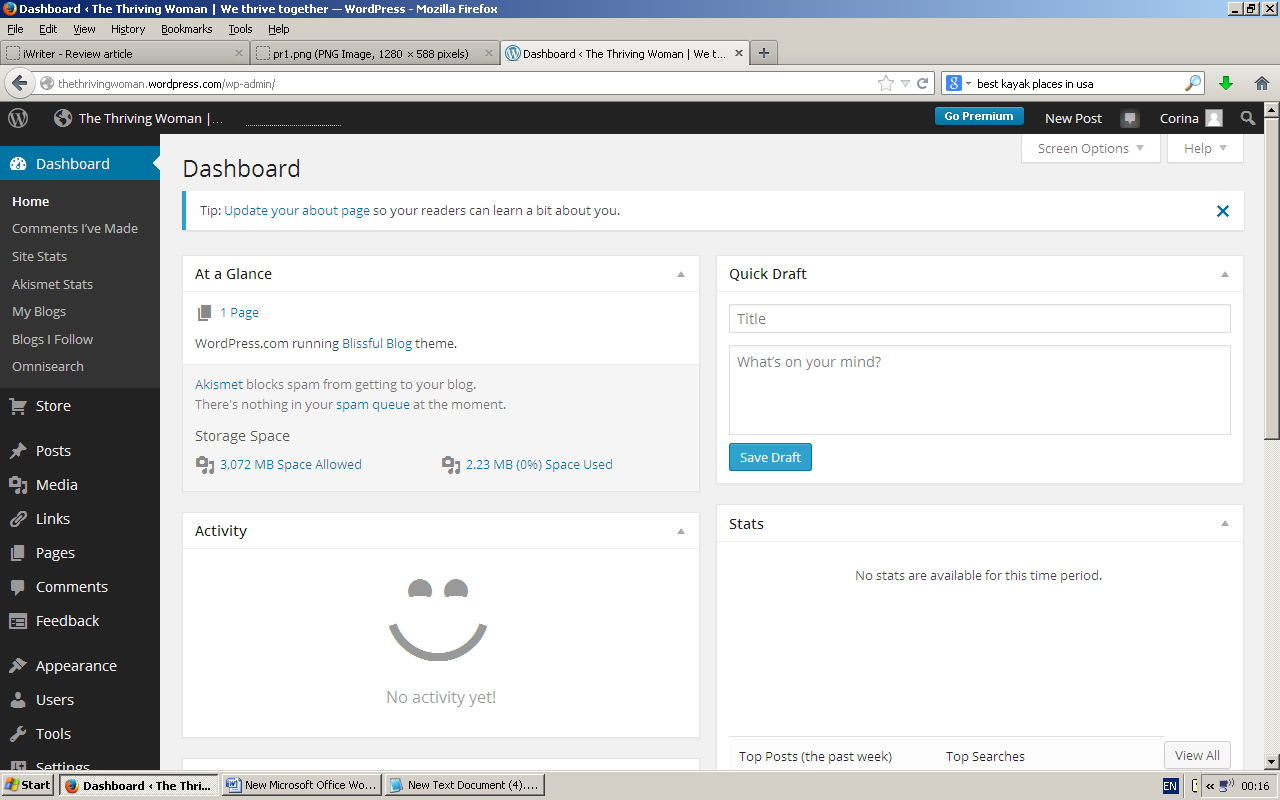
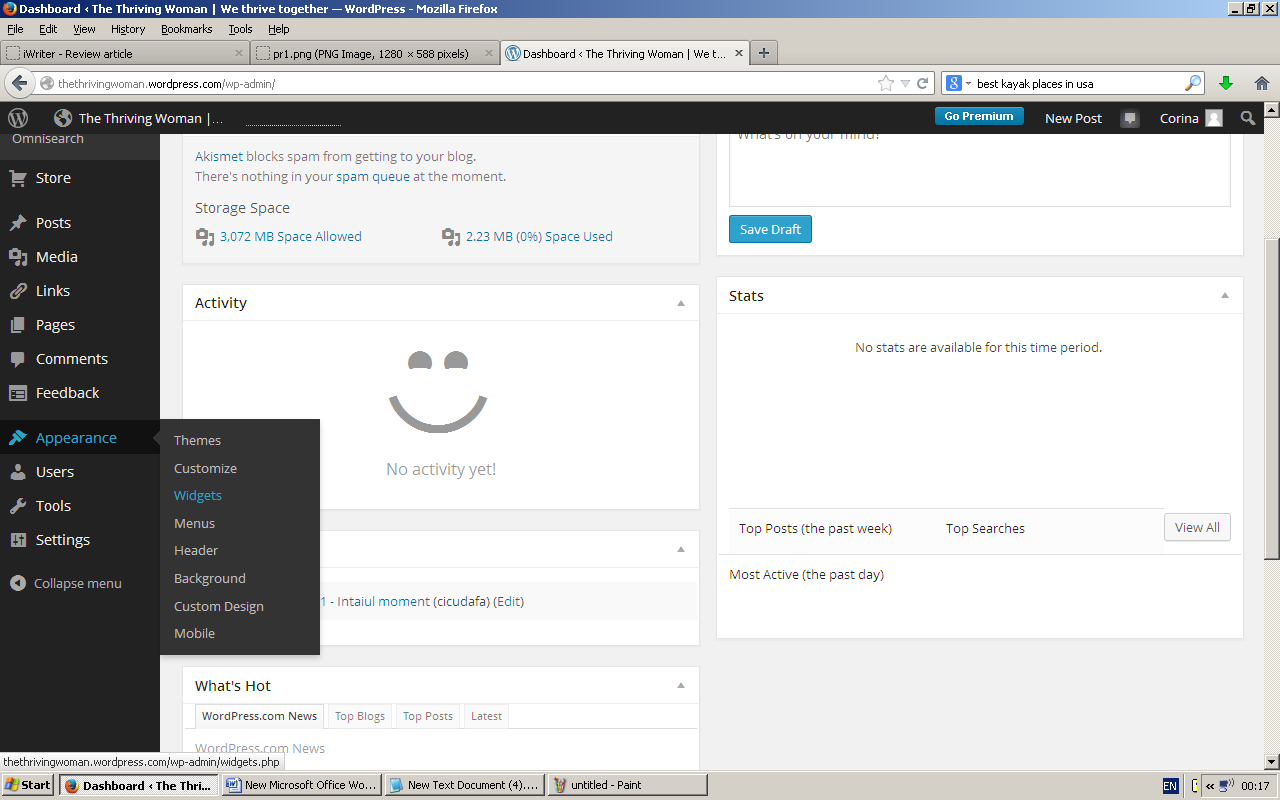
Go to your website’s dashboard. Make sure to install WordPress platform to your website first, otherwise you will not be able to proceed further. On the left side of your dashboard, you should see several buttons. Locate “Appearance”, hover it with your mouse and then click “Widgets”. If you do not have the newest version of WordPress, then your interface might look different, so the process is going to be different, as well. In that case, locate “Appearance” in the navigation bar on the left side of your dashboard and click on it – at this point, a drop-down-like menu should appear just below it. Now click “Widgets”.
Step 2
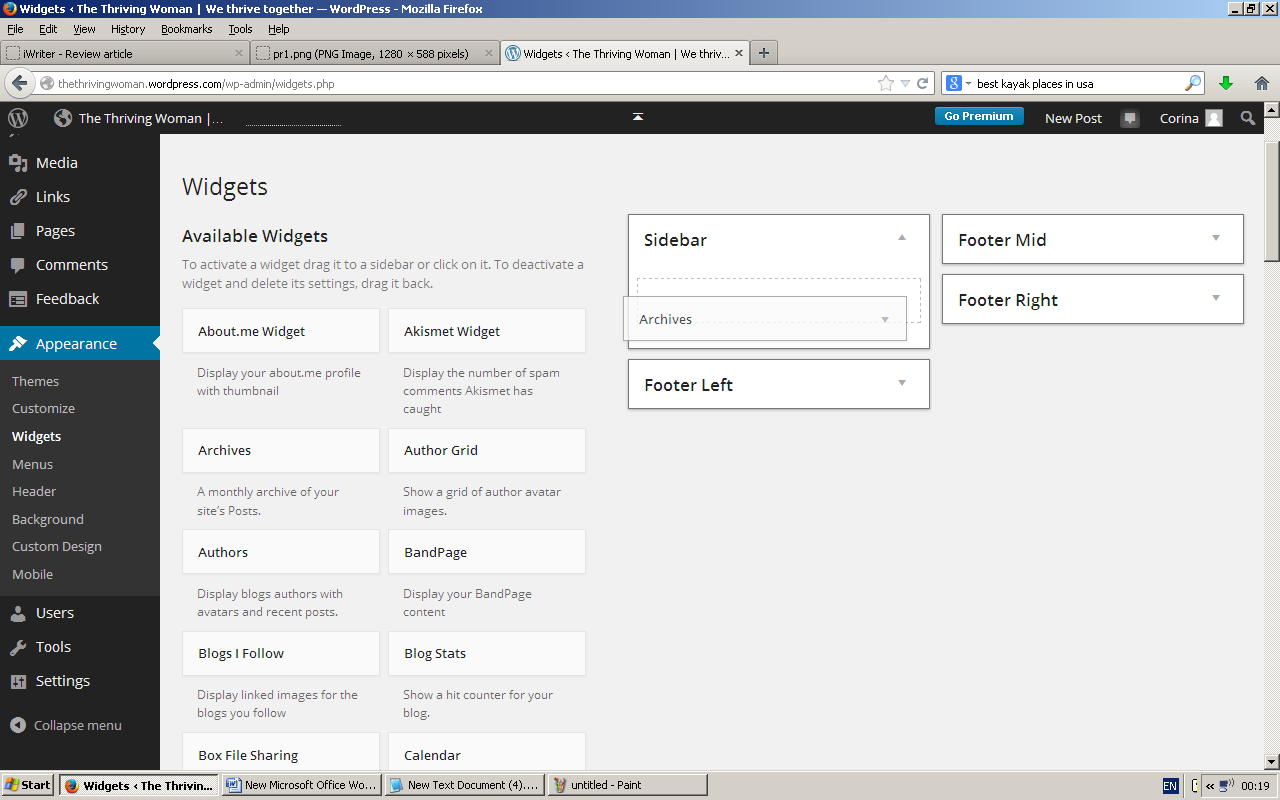
After you reach the “Widgets” section, locate the “Sidebar”. Regardless of what version of WordPress you are using, it should be located on the right side, along with the other widget areas your theme includes (Footer 1, Footer 2, Footer 3, etc.). If you look on the right side, you will see several widgets – for instance, ‘Text”’, ‘Archive’, ‘Authors’, ‘Blogs I Follow’, ‘Calendar’, ‘Contact Info’ and many others. Note that you will not be able to see what they do until you place them in your Sidebar.
Step 3
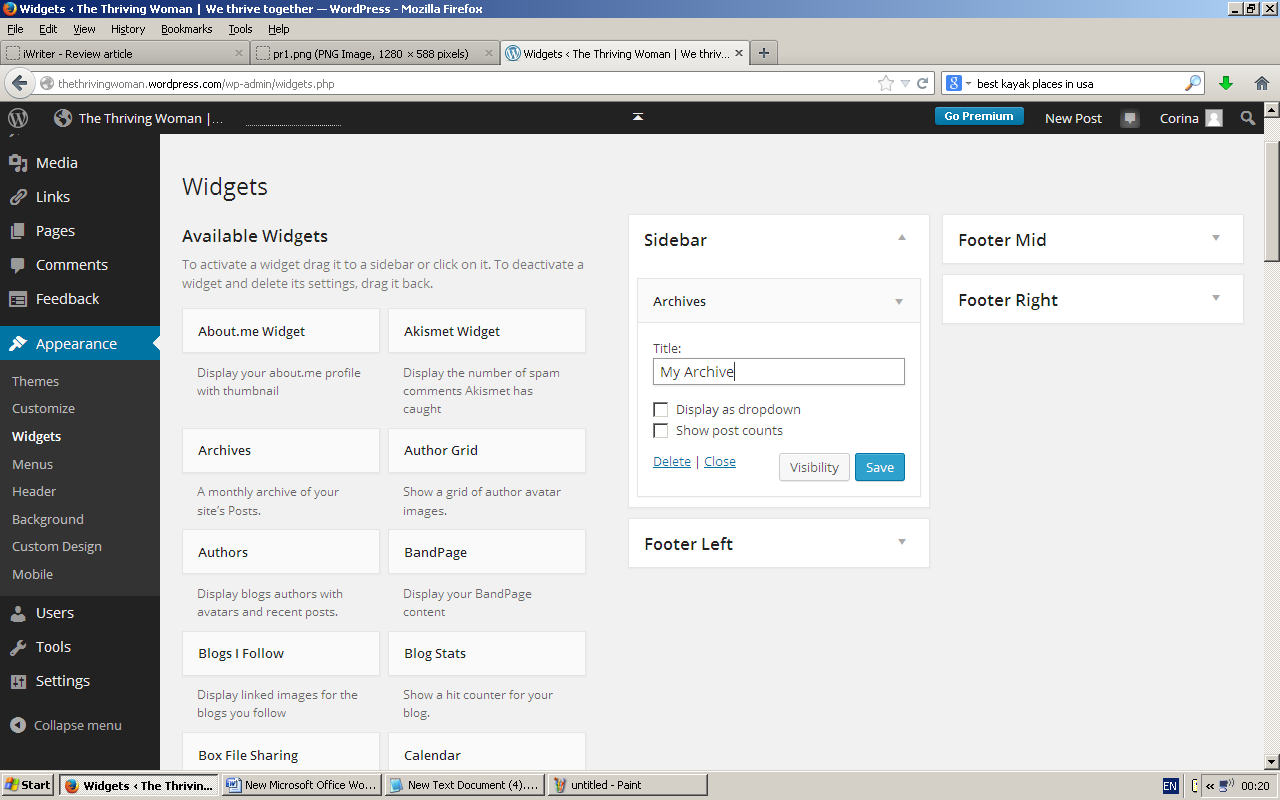
To add your first widget, you should hover it with your mouse and drag it to the Sidebar. If you are using the newest version of WordPress, you can also click on the widget you have chosen, select in which widget area you want to add it and click “Add Widget”. You can try to add, for instance, “Archive”, widget. In the box labelled “Title”, make sure to introduce the title you want to appear on your website – e.g. “My Archive”. You can select if you want it to appear as a drop-down menu, or if you want the post counts to be displayed. Once you adjust the settings as desired, click “Save” to save your settings.
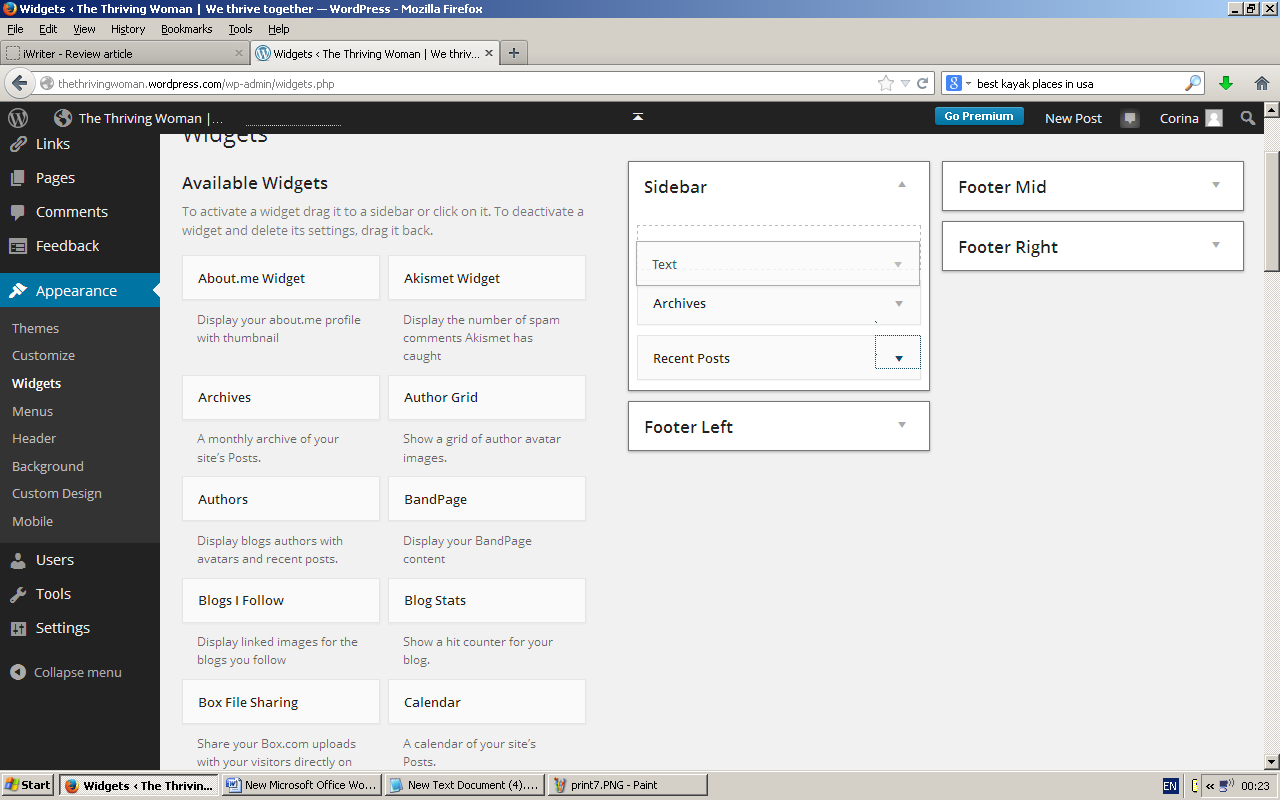
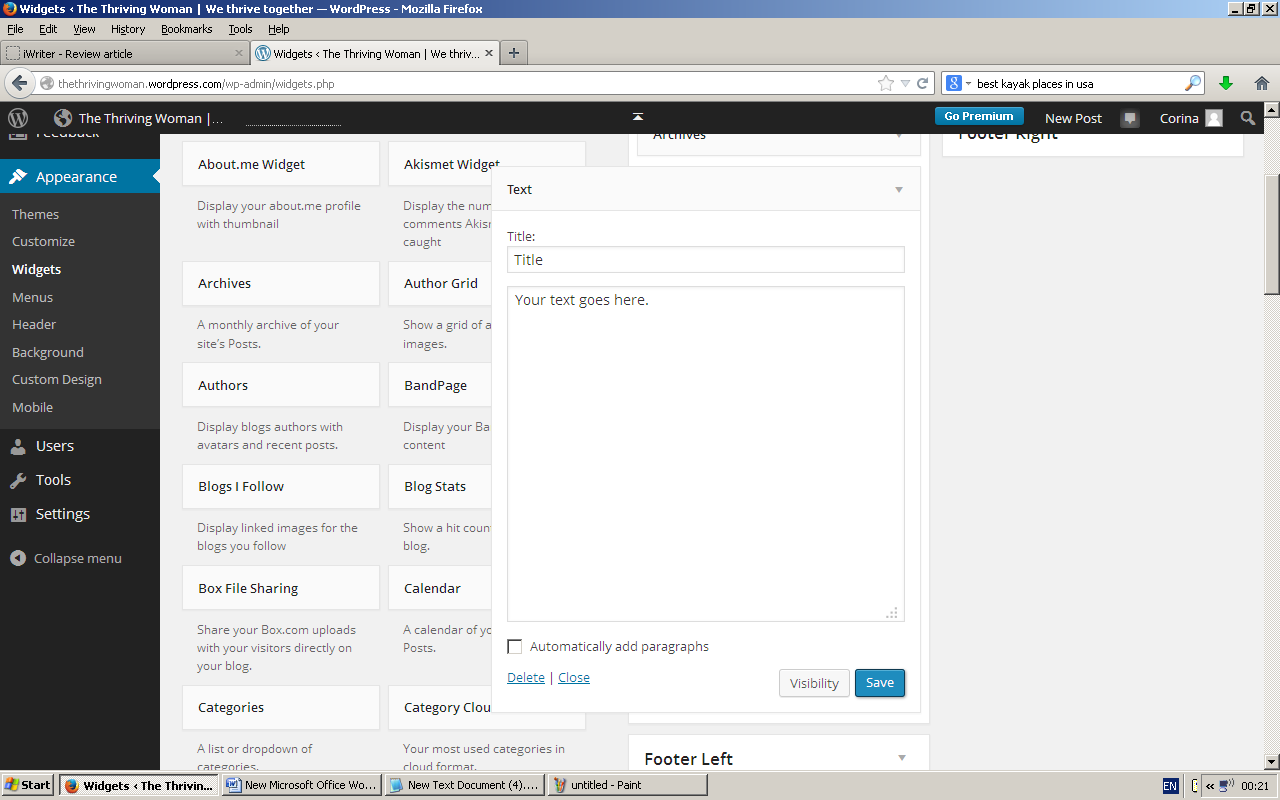
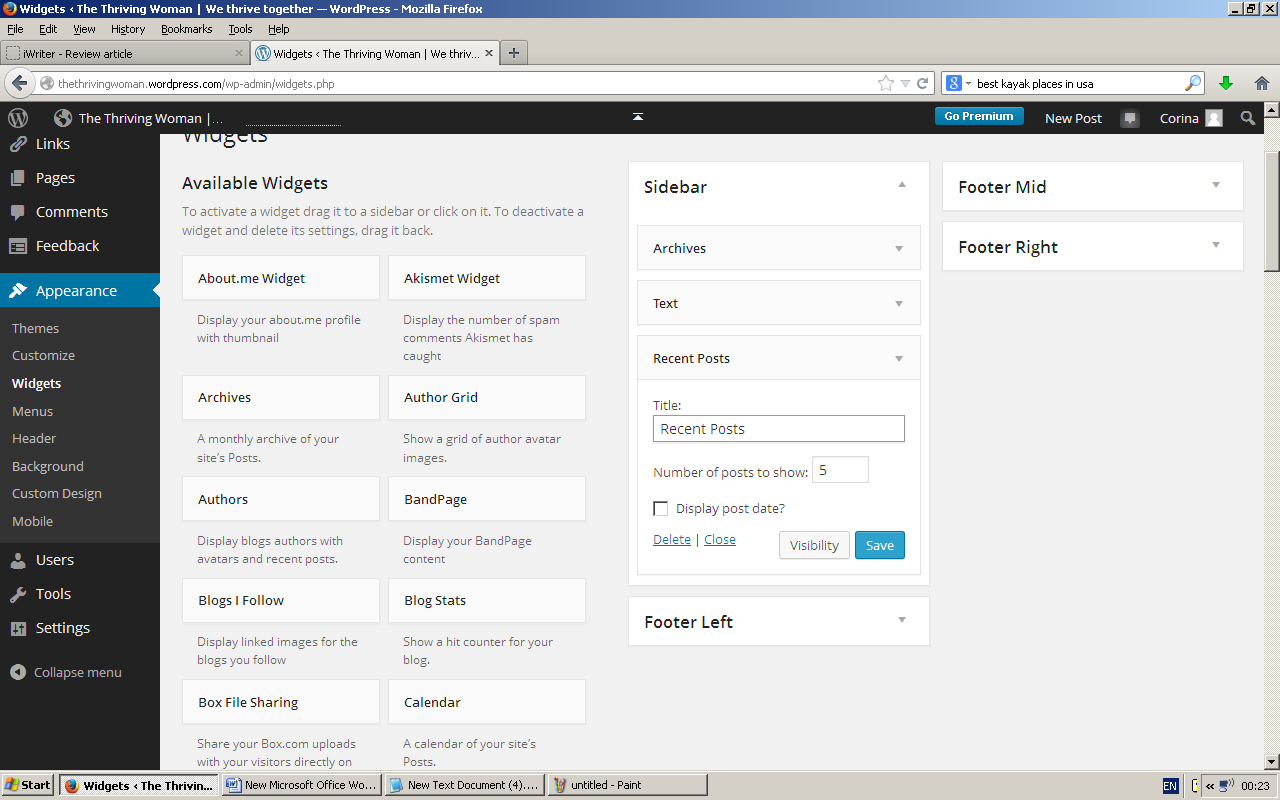
You can then add other widgets you want – for example, “Text” or “Recent Posts”. Once you add the widgets you desire for your website, you will be able to adjust their settings, too, and save them by clicking “Save”.
Step 4
If you do not like the current arrangement of your widgets in the sidebar, you can easily change it by dragging each widget in the desired place. In this example, the “Text” widget in the second position is moved on top, above “Archive” widget. To edit their settings, click on the arrow that appears next to them.
