How to Create Backups For Your WordPress Blog?
Backing up your WordPress blog from time to time is essential, particularly because many times, your database might be threatened by external factors, such as viruses, malware and the others. Thankfully, WordPress is an advanced platform with many features that can simplify your life, especially if we talk about backups.
If you are concerned about your security and want to make sure that your posts, pages, widgets and all data on your WordPress blog will be safe, backing up the entire database if highly recommended. Follow the step-by-step guide below to learn how to proceed.
Step One
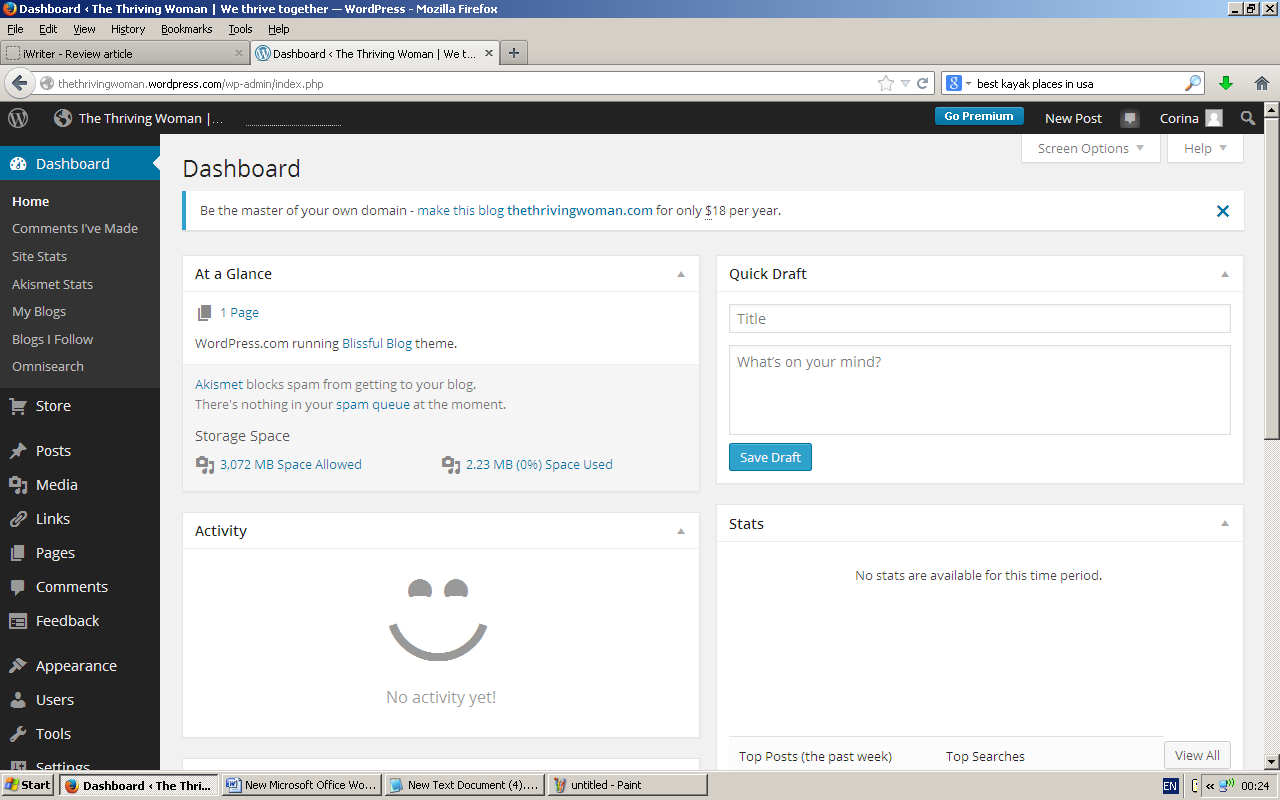
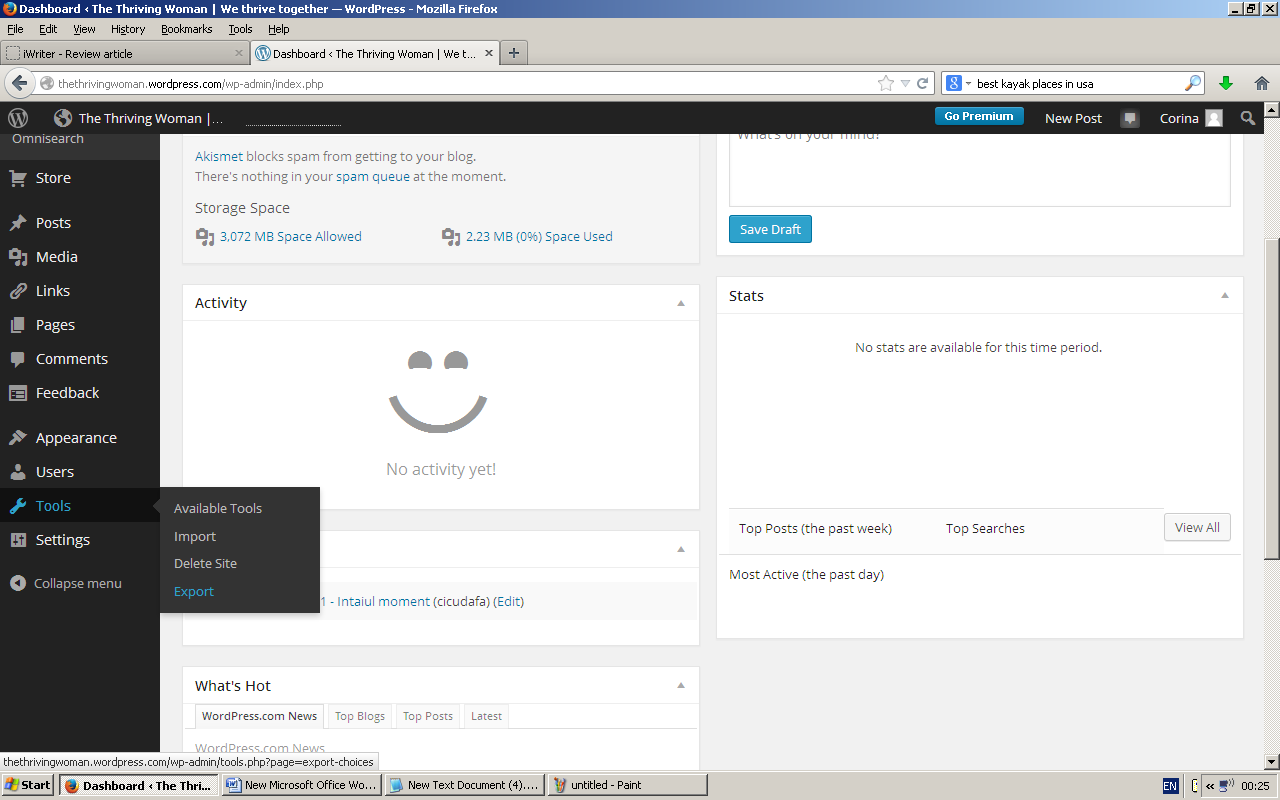
Go to your website’s dashboard. Note that these steps will work whether you are using a free domain at WordPress, a paid domain from WordPress or your personal domain where you have installed the WordPress platform. On the left side of your dashboard, you should see a navigation bar with several buttons. Locate “Tools”, hover it with your mouse and click “Export”. If you do not have the latest version of WordPress (which is applicable only if you have your personal domain with WordPress platform installed), then the appearance of your dashboard will be different. In this case, locate and click on “Tools” – at this point, you should see a drop-down-like menu appearing below. Now click “Export”.
Step Two
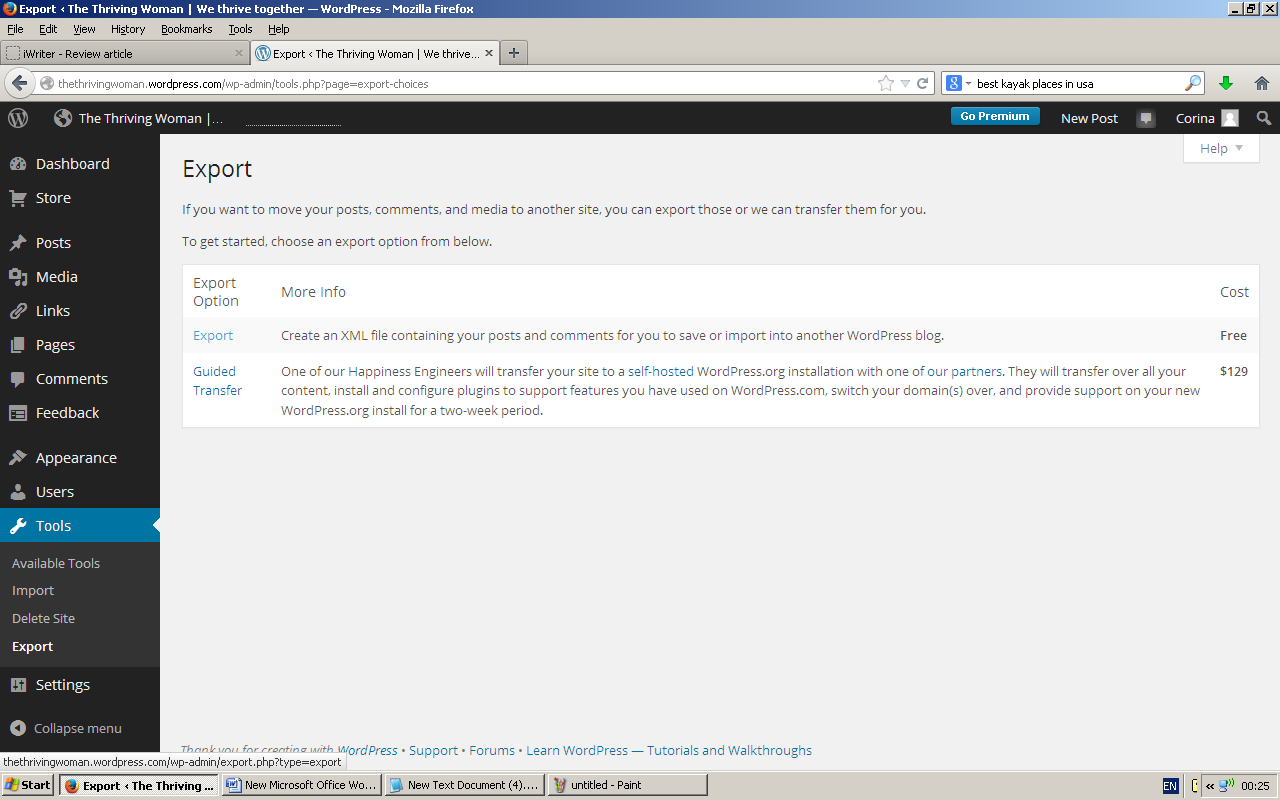
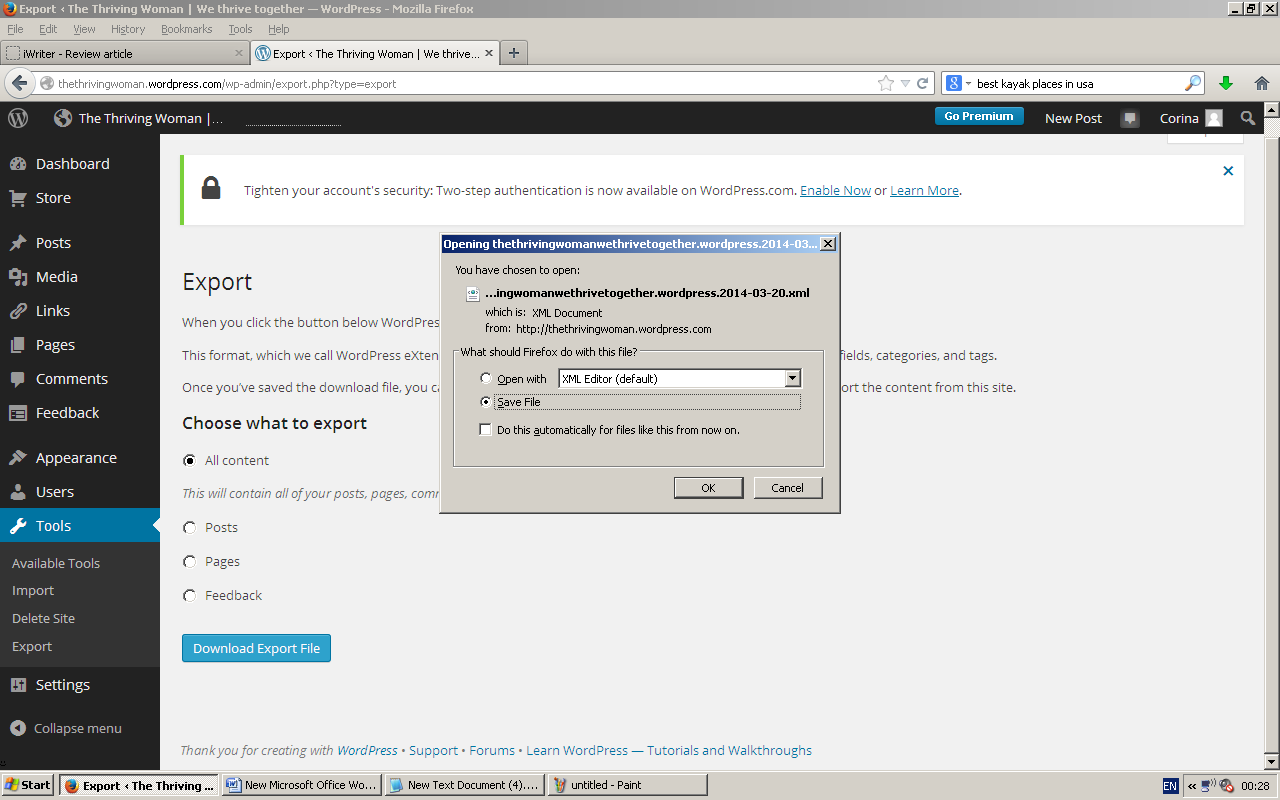
Now you should see two options – “Export” and “Guided Transfer”, which come with different features and cost. If you want to go through the guided transfer, you should click on it – but pay attention to the fee of $129 you will have to pay. If you want to pay nothing, click “Export” instead. Note that this action will allow you to export your posts, pages and feedback only.
Step Three
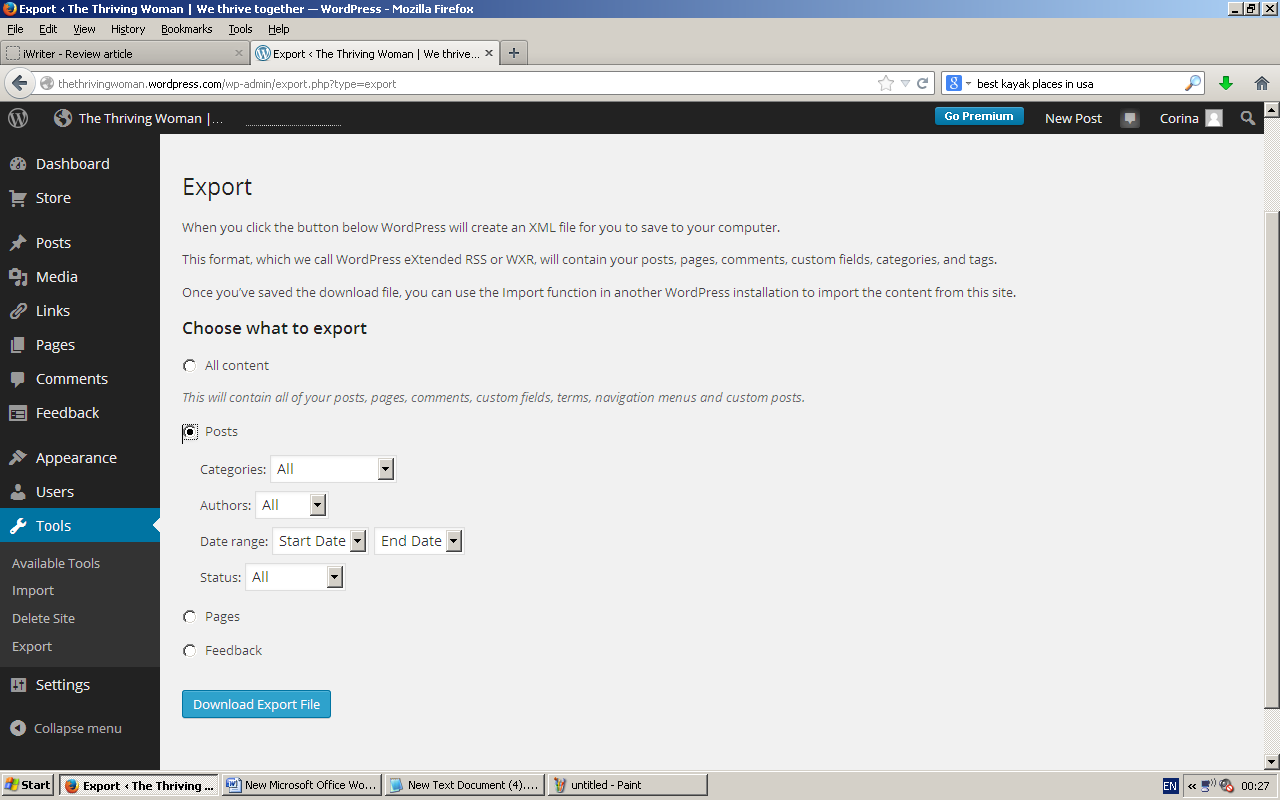
At this point, you will be able to select what you want to export. You can mark “All Content” if you want to have all posts, pages and feedback exported/backed up, or you can select them individually, adjusting the settings as per your needs. For instance, if you mark “Posts”, you will be able to select the categories, authors, date range and status; for “Pages”, you will be able to adjust the authors, date range and status fields; the settings are automated for “Feedback”.

Step Four
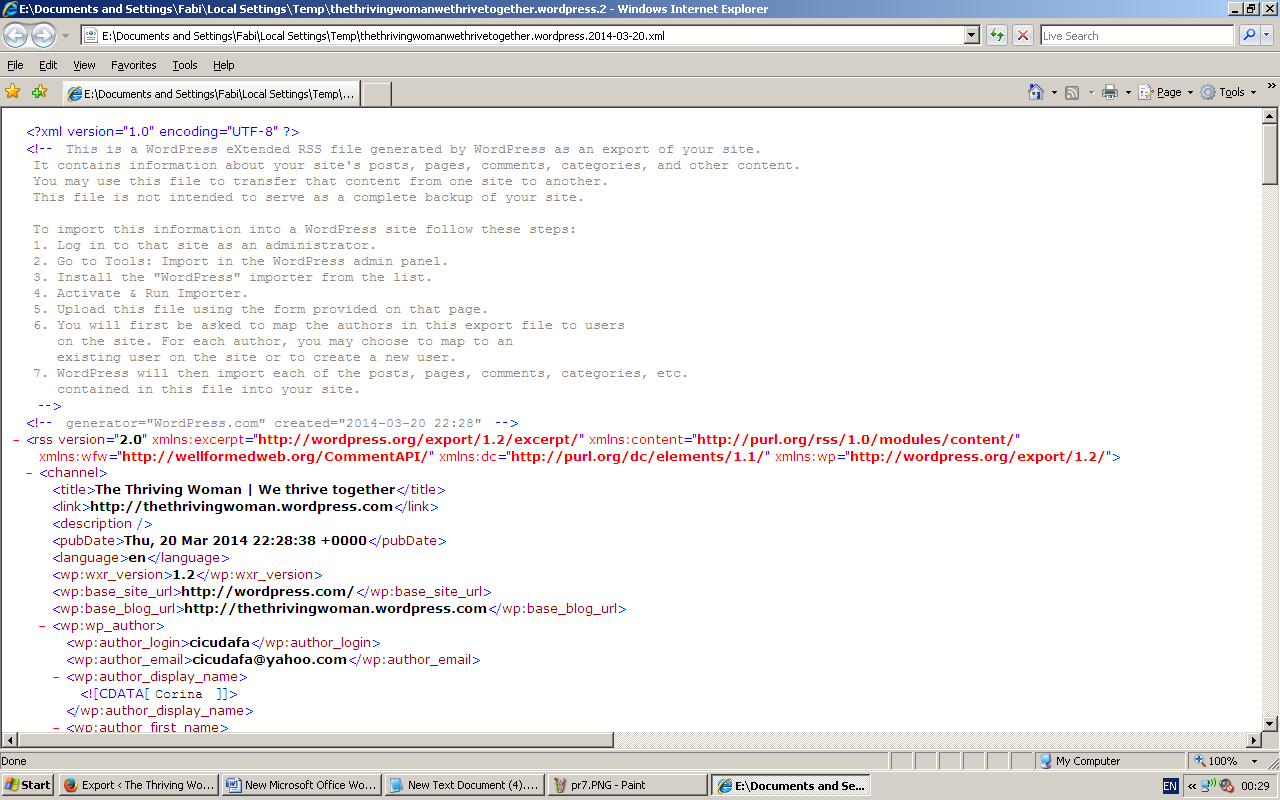
Once you have selected which content to back up, click “Export”. If you are using Mozilla Firefox, then you will be able to select whether to save your document, as well as its location. Keep in mind that exporting “All Content” will allow you to download a single XML file, which can be later opened using Internet Explorer. On the other hand, if you choose to export only “Pages” and “Posts”, you will have to first mark “Pages”, adjust the settings as desired, click “Export” and save the file, then mark “Posts” and go through the same process.

You can back up your WordPress blog at any time this way, so that you can successfully prevent your data from being removed, corrupted or endangered by other potential sources. By backing up your data, you will be able to restore your blog and prevent its loss at the same time.