How to Add Google Analytics to your WordPress Website
Tracking the performance of your website is a demanding task, especially if you are not used to working with WordPress platform. Thankfully, Google Analytics will offer you everything that you truly need in order to know everything that happens to your website, including number of visits and visitors, keywords, and much more.
Once you learn how to install Google Analytics on your WordPress blog, you will be able to track it every single day, to know whether you should improve your marketing strategy or not. Follow the guide below to see how to proceed.
Step 1
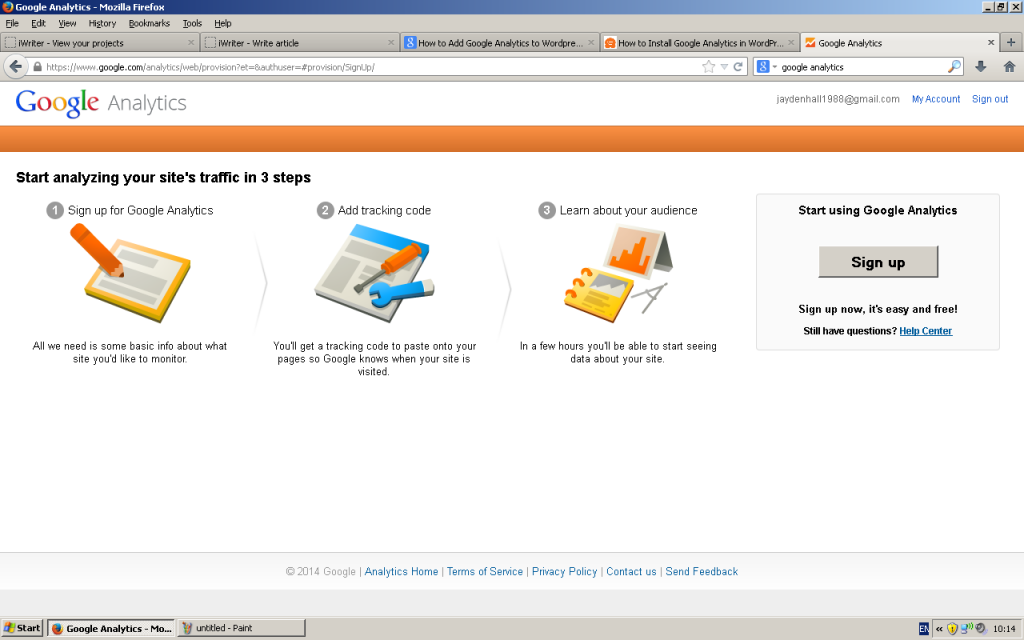
Go to www.google.com/analytics. If you do not already have a Google account, then it is the right time to create one. Once you sign in, click “Access Google Analytics” at the top of the screen and wait until you see a message saying “Start using Google Analytics”. Click ‘Sign up’.
Step 2
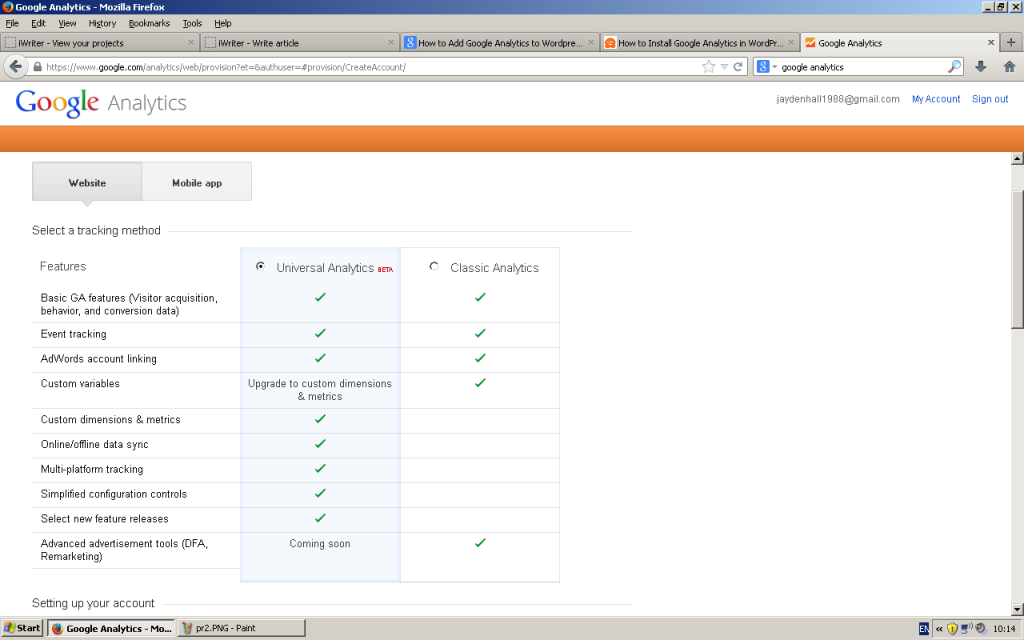
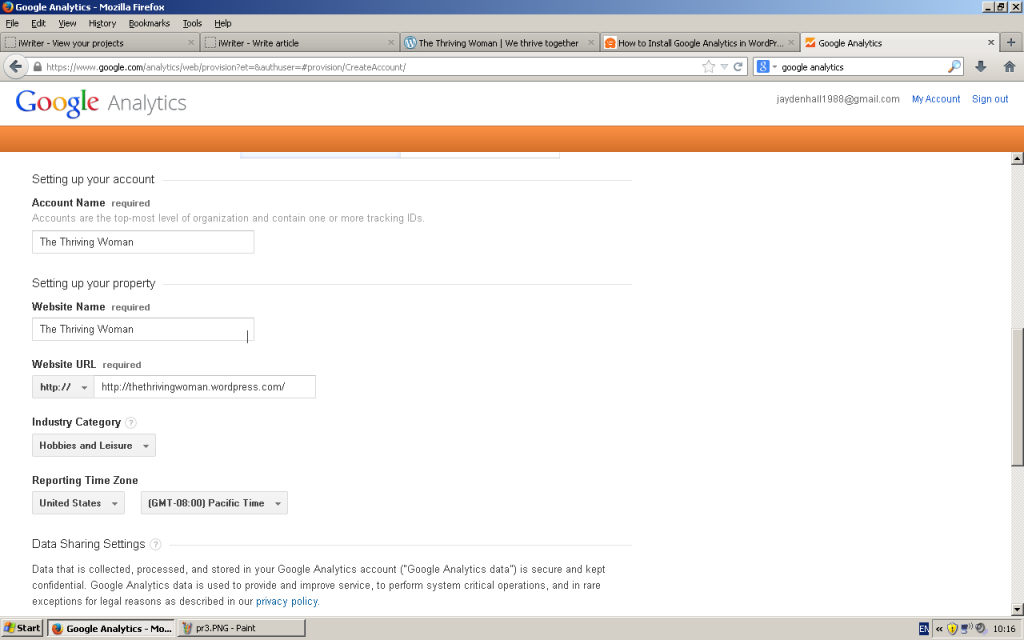
Now it is the time to fill in a couple of fields that will allow Google Analytics to generate a unique tracking code (ID). First, be sure to select “Website” at the top of the screen, then scroll down the page and insert an account name (it can be anything you like, from numbers to symbols and back again), the name of your website (e.g. The Thriving Woman), the URL of the website (e.g. www.thethrivingwoman.wordpress.com, unless you have your personal domain), category it belongs to (e.g. Hobbies and Leisure) and reporting time zone, with your country and current time zone.
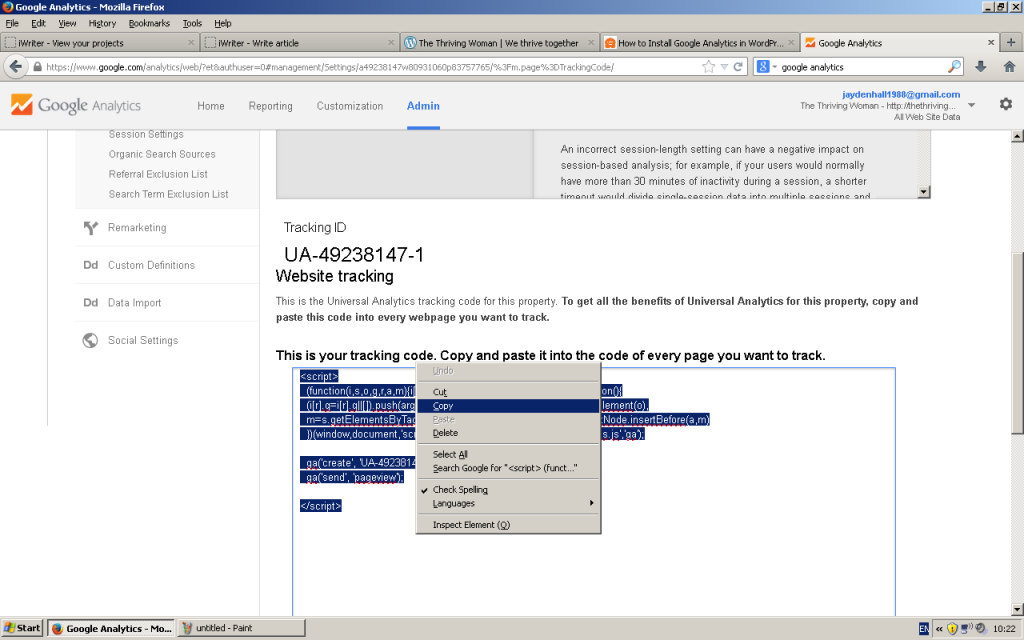
Step 3
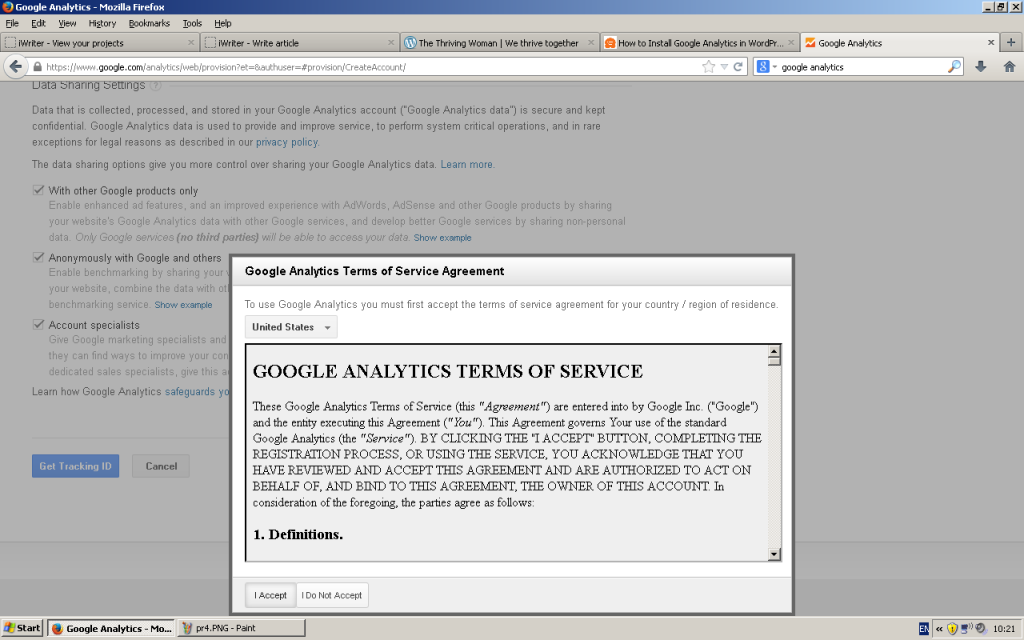
Once you have completed this information, scroll down the page and click ‘Get Tracking ID’. A window will pop up, asking you to accept the Google Analytics Terms of Service. Click “I Accept”. You will be then redirected to a page where you will see a tracking ID. Select it with your mouse or by pressing CTRL + A, then copy it (right click, “Copy” or CTRL + C).
Step 4
At this time, with your tracking ID copied to the clipboard, you can go to your WordPress dashboard of your website. Locate “Appearance” on the navigation bar on the left side, hover it with your mouse and click “Editor”.
In case you do not actually have the latest version of WordPress, you will have to locate and click “Appearance”, wait until a drop-down-like menu shows up, and click “Editor”.
Step 5
On the right side, you will see several templates. Find and click “footer.php”. Scroll down to the bottom of the template, locate the </ body > tag and paste the tracking ID right above it (right click, “Copy” or press CTRL + V). Once you complete this step, click “Update File”. Note that inserting the Google Analytics tracking ID in the “footer.php” file will place the analytics at the bottom of the website. You can place it in the sidebar by installing a PHP Coder plugin, dragging the box to the Sidebar and pasting the tracking ID there.

Step 6
To access the analytics of your website, go to www.google.com/analytics and click ‘Access Google Analytics’. You will be redirected to a screen with your website listed there, along with several columns labelled “Visits”, “Avg. Visit Duration”, “Bounce Rate” and ‘Goal Conversion Rate’. You will be able to access this page on a daily basis to track your website’s performance.