How to Place a Banner In the Sidebar
Adding banners to your website is perhaps one of the easiest processes you have to go through when designing your website. Whether we talk about banners that link to internal or external pages, all of them can be easily included to your Sidebar, regardless of how much experience you actually have. Furthermore, whether you have a blog hosted by WordPress or your personal domain where you have installed this platform, the guide bellow will show you how to proceed in order to add a banner.
Step One
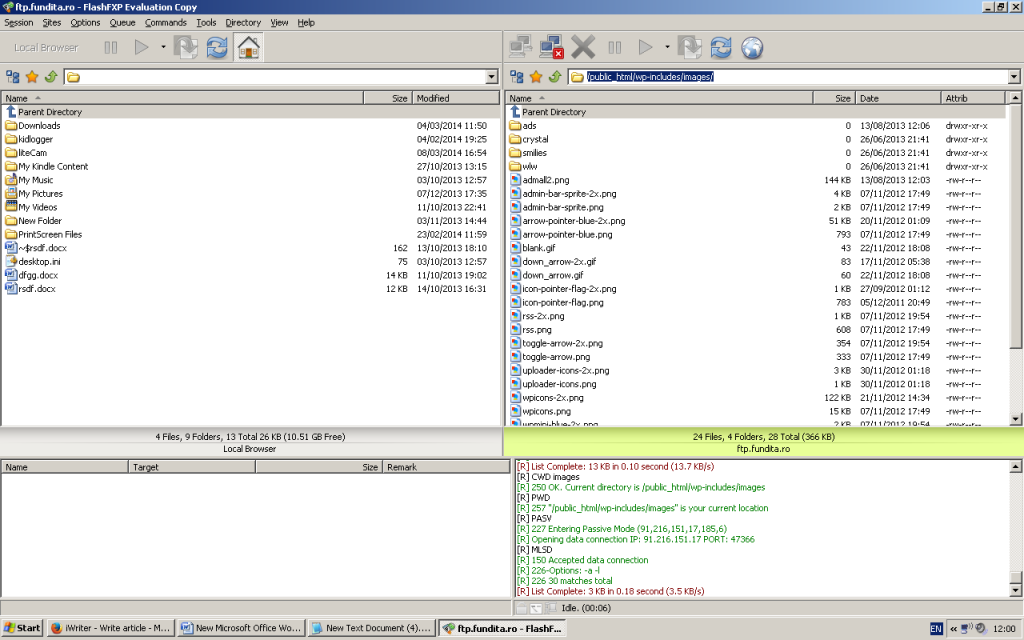
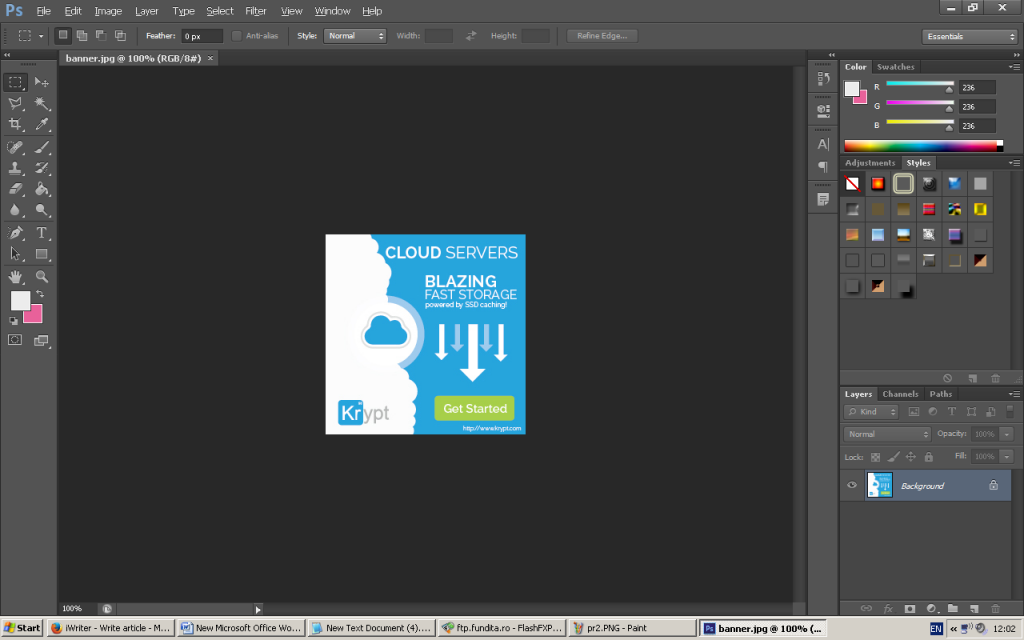
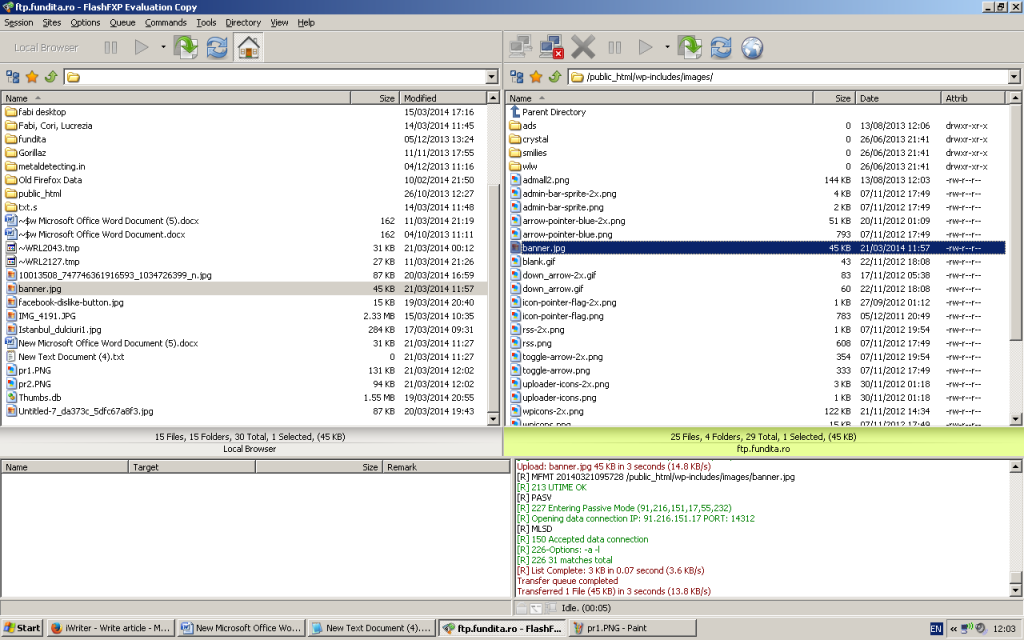
Assuming that you do not have a banner already, you should first design it, or have it designed by a third-party company or individual. Once you have this banner, you have two options for adding it to your Sidebar. First, you can upload it to FTP by accessing the “wp-includes” folder, then “images”. You can choose to create a new folder or leave it as is. Note that this option will only work if you own your personal domain, and not if your website is hosted by WordPress.
The second option you have is uploading the banner to a third-party website that hosts images – for example, Photobucket or TinyPic. This will work for both situations, but it is better to choose the first option if you have your personal domain.
Step Two
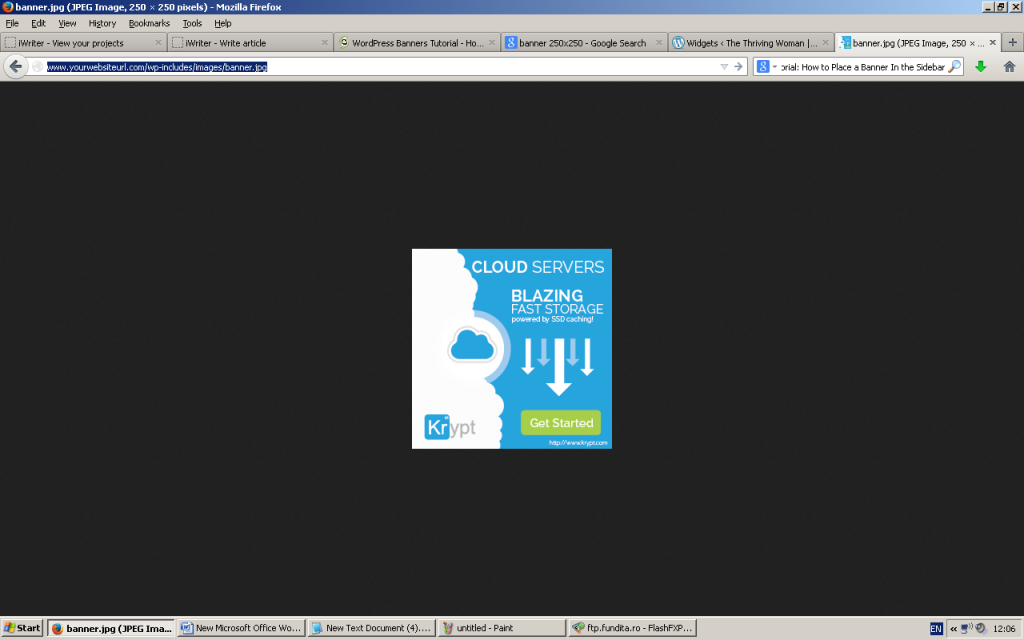
Once you have uploaded your banner to either your FTP database or a third-party website, you should copy the direct link. For the FTP database, the link will have the following structure: www.yourwebsiteurl.com/wp-includes/images/banner.jpg. This will vary depending upon where you have uploaded the banner. In case of the third-party website, you will have to copy the link that was automatically generated.
Step Three
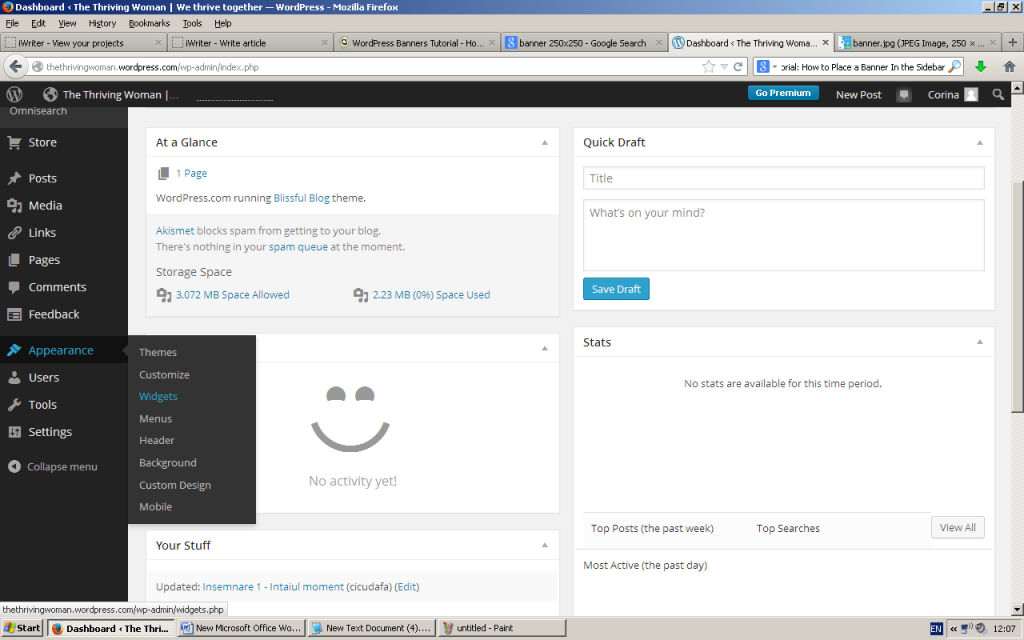
Access your website’s WordPress admin panel (dashboard). Locate “Appearance” on the navigation bar on the left side of the screen, hover it with your mouse and click “Widgets”. If you do not have the latest version of WordPress, then you will have to click on “Appearance” instead of hovering it with your mouse, then click “Widgets”.
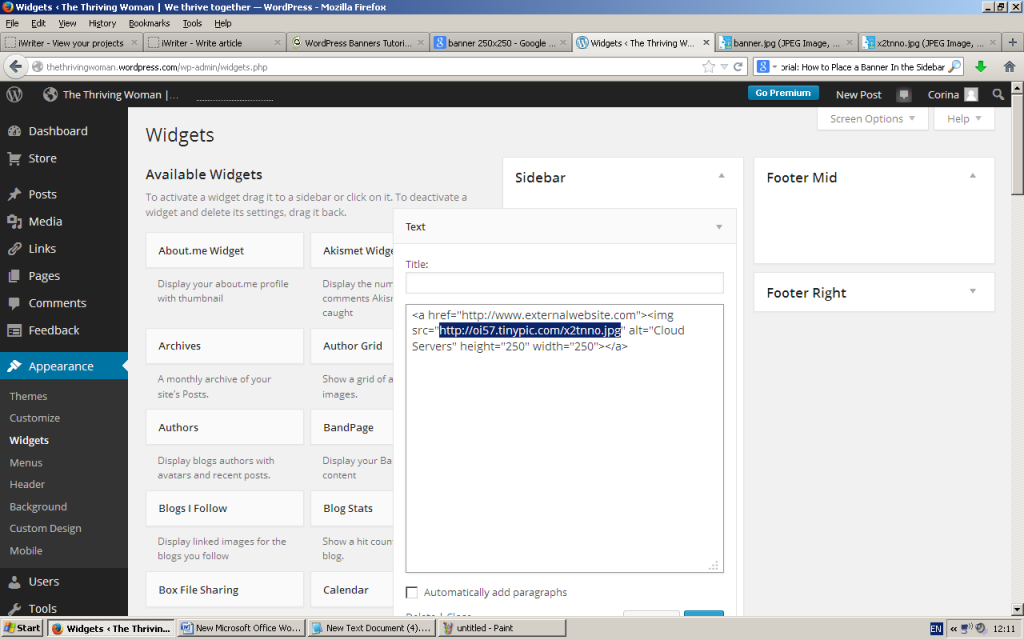
Step Four
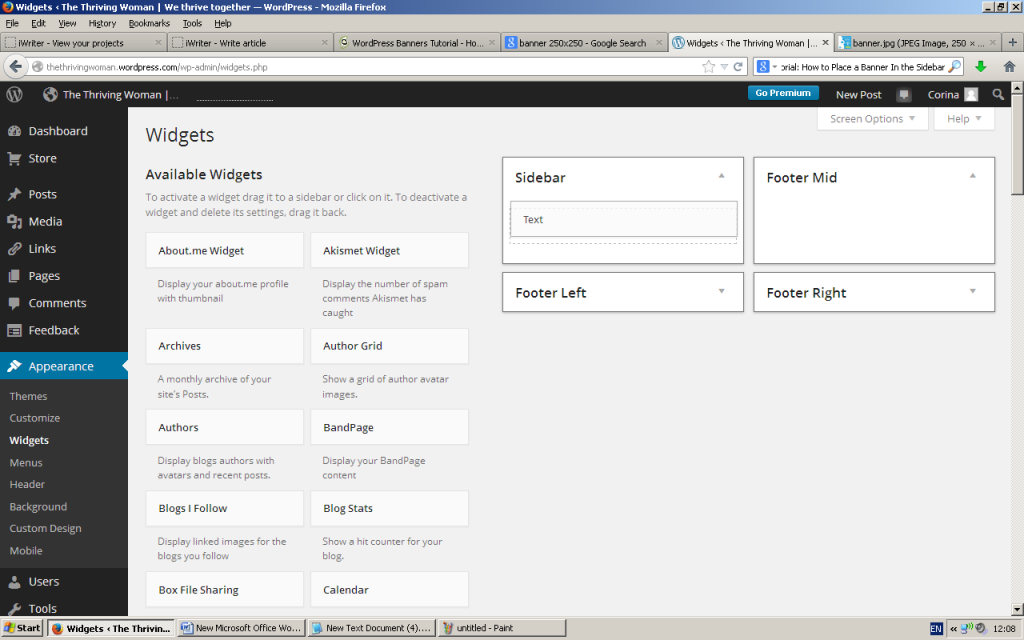
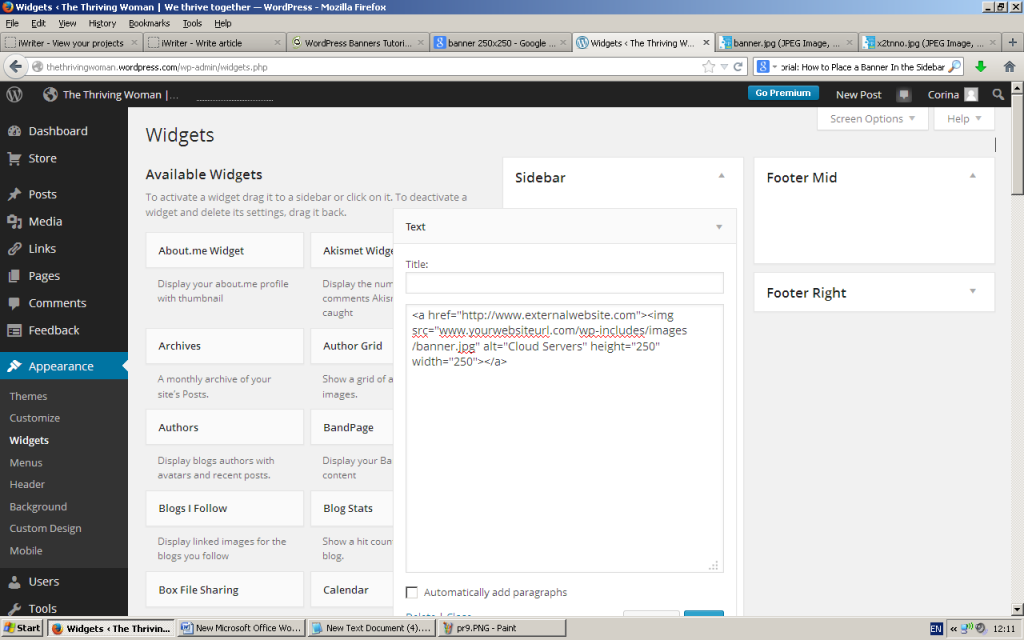
Once you have reached the “Widgets” section, locate the widget named “Text” and add it to your Sidebar, in the desired position. You can choose to drag it there with your mouse, or click on it, select “Sidebar” as location and click “Add Widget”. At this point, you should have a “Text” widget in your Sidebar.To add the banner, you have to write the following code first of all: < a href=” ” > < img src=” ” alt=” ” height=” ” width=” “> < / a >.
Copy and paste the link of the website where you want the banner to redirect (e.g. www.externalwebsite.com) between the first set of quotes; the link location of the banner (see step two) within the second set of quotes; an alt text (e.g. Cloud Servers) between the third set of quotes; and the dimensions of the banner between “height” and “width” labels (e.g. 250, 250).
Now, the code should look like this:
< a href= ‘http://www.externalwebsite.com’ > < img src= ‘www.yourwebsiteurl.com/wp-includes/images/banner.png’ alt= ‘Cloud Servers’ height= “250” width=”250″ > < / a >. ‘
Add a title if you want – e.g. “Recommended”.
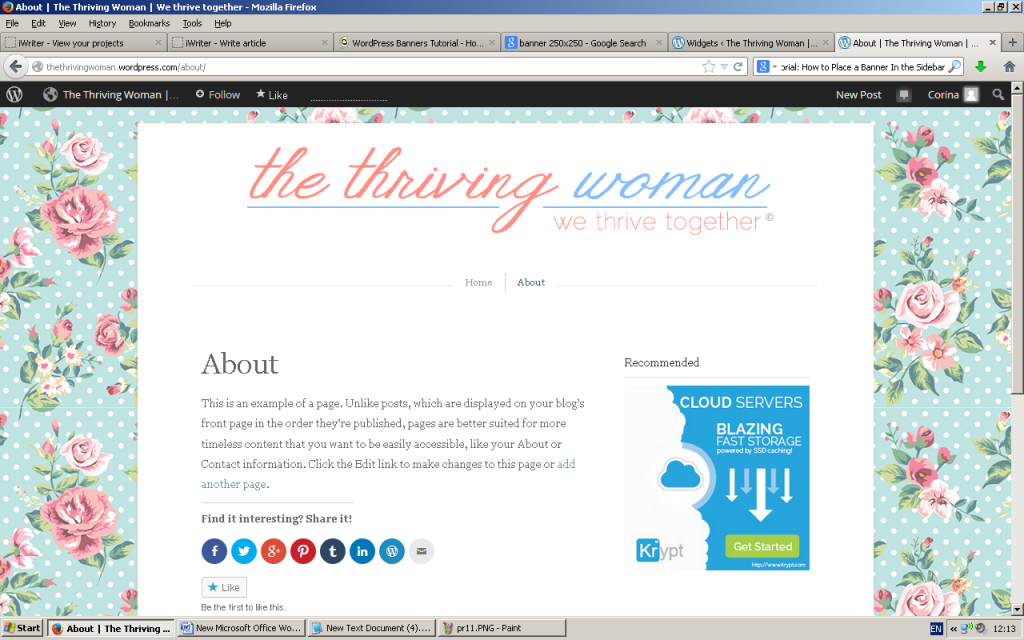
Click “Save”. Your banner will be published to the Sidebar.
Note that the link between ‘img src’ tag will vary depending upon where you have uploaded the banner.