How to Add in Contact Form into WordPress Website
Having problems in identifying and clearing the enquiries?
Fret not! There is a way to make it easy for you to avoid any spams by adding a build-in contact forms into your website.
PURPOSE OF CONTACT FORM
The purpose of using the contact form into your website is to increase your customer’s enquiries and also an effective way for your staff to handle the enquiries. Your readers may have another alternative way to communicate with your company by providing the contact form instead of contacting through phone as the phone line can be busy at times.
Firstly you will need to use the plugins for your contact form. You don’t need to worry as there are quite a number of plugins available to add the contact form into your website.
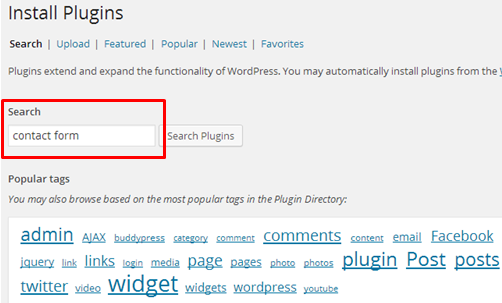
- You need to click on the plugins on the left side of navigation and select ‘Add New’.

- After clicking the ‘Add New’, it will show the page shown below.
- Fill ‘Contact Form’ in the search box.
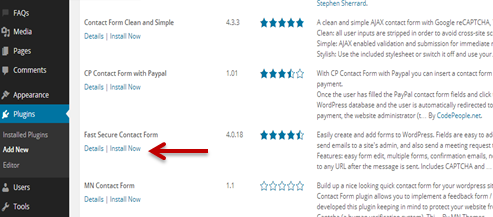
- Once you have clicked the search plugins, it will show a range of contact forms plugins.
If you have no idea, which forms are suitable for your website, you may look through their reviews and ratings or search the ‘Top 10 WordPress contact form plugins’ on any search engine.
- Select which met your preference of contact form by clicking it.
- Click on ‘Install Now’.
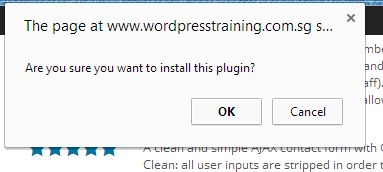
- After clicking ‘Install Now’, it will show a pop out box shown below and click ‘OK’.
- It will bring you to this installing page and show it has been successfully installed the plugin and click ‘Activate Plugin’.

- Please check if it is activated.

You have completed the installation of contact form plugins.
- Click on ‘Settings’ beside the ‘Deactivate’.
The next step is creating and customises the contact form to your own preferences. The screenshot below show the page it will bring you once you have clicked ‘Settings’. You can see at the left side of navigation, there is ‘FS Contact Form’ added in which has been highlighted in red box.
- Add a name for the form under ‘Form 1 label’.
- You can type in ‘Comments or questions are welcome’ under ‘Welcome introduction’.

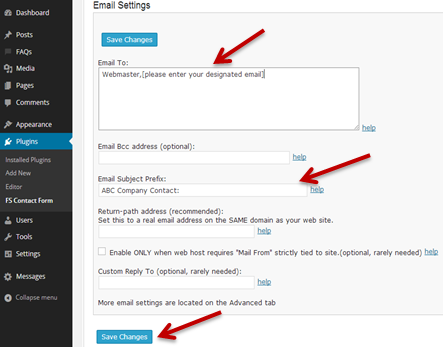
- Please enter your designated email.
- You can enter your company name to indicate upon receiving it through your email.
- Once you have done, click ‘Save Changes’.
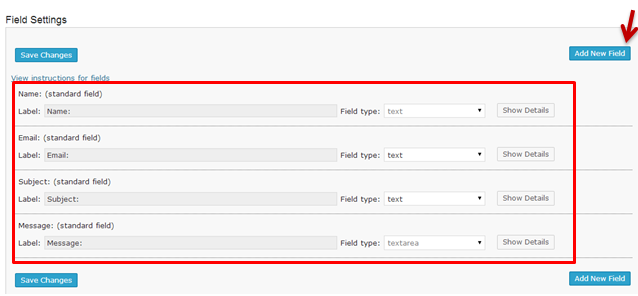
- Click ‘Fields’.

- You can check if these are the fields that you would like it to show in your form. which has been highlighted in red box.
- If you need another field, you can ‘Add New Field’.
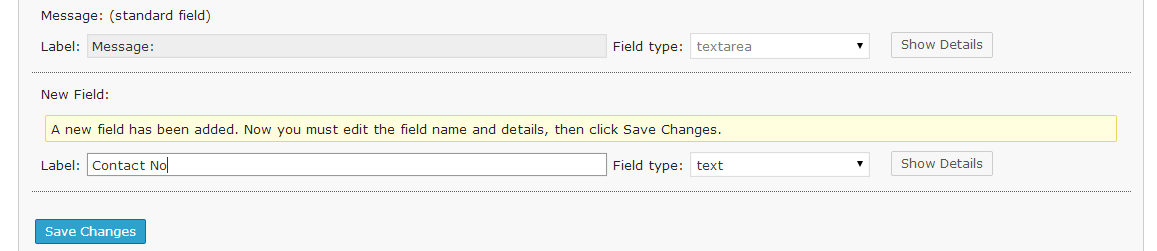
- Once you have clicked ‘Add New Field’, it will appear New Field.
- Type in ‘Contact No’ under Label and you can check for the field type as well.
- You can arrange the field by dragging the field accordingly.
- Click ‘Save Changes’.
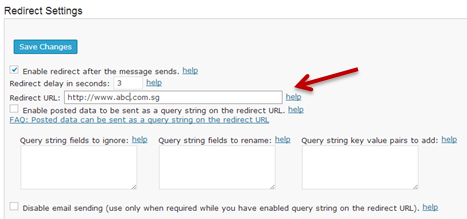
- Click ‘Advanced’.
- Fill in the blanks which have been highlighted in red box.

- Scroll down you will see ‘Redirect Settings’, add in your company website. This purpose is to bring to another page once they have done with the ‘Enquiry Form’.
- Remember to click ‘Save Changes’.
- Click on the ‘Preview Form’ so you can check out the form you have created.
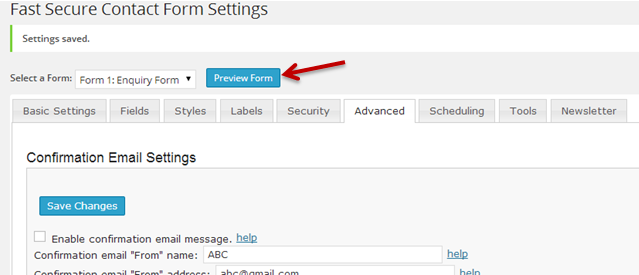
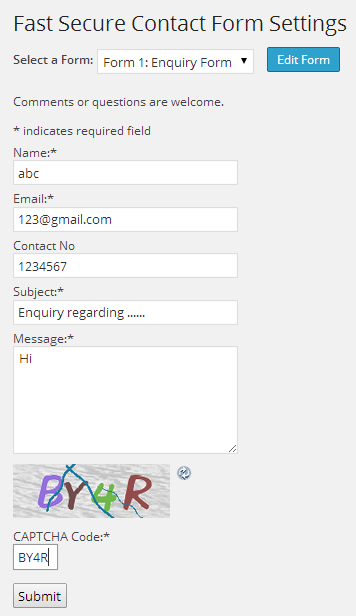
- Once you press ‘Preview Form’, it will bring to another page shown below.
- You can type in the entire required field to test whether if it is working.
- Click ‘Submit’.
- After submitting, it will bring to your company’s website which you have done under the ‘Redirect Settings’
- Check your designated email.
- You will receive an email similar to the screenshot below that you have submitted earlier on, it means that the form is working well.

You have successfully created and customise contact form for this step.
For the last step, you will have to add in the form into your website.
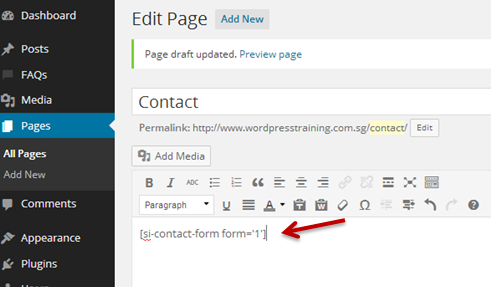
- Go to ‘Pages’ on the left side of navigation.
- Select the page that you would the contact form to appear.
- Add in ‘[si-contact-form form=’1′]’.
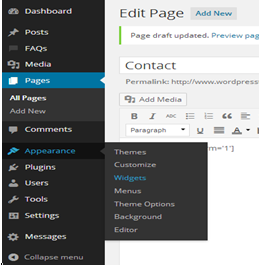
- Click ‘Widgets’ under the Menus.
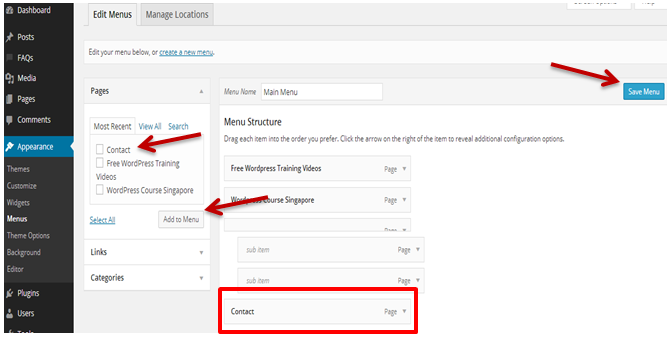
- Select the page which you want the contact form to appear under the Pages, click ‘Add to Menu’ and it will appear under Menu Structure.
- Click ‘Save Menu’.
- You can view your website to check if the page you intended to appear in the website is working well.

That is the final step of adding the contact form. Your contact form is ready to be use in your website.
Do visit our website, WordPress Training Singapore.