How to install WordPress for my website?
After having a brief overview of what wordpress is and its capabilities, it’s time to install wordpress on your web server and play around with tools to learn more.
The below guide assumes that you have webhosting account and a domain name attached to it. If you do not have then, you need to buy them first.
WordPress can also be installed on your local computer using special software like XAMPP. But here you will learn to install it on your web server. You may Google if you want to install it on your computer.
Now a days almost all webhosting providers give a Quick Install feature for WordPress and many other popular platforms. We will first see how to setup wordpress using Quick Install and then by the other way.
If you have any issues regarding WordPress Installation then contact your webhost provider to guide you through the installation.
Quick – Install WordPress Method
The exact procedure for “Ouick Install” WordPress depends on the webhosting you use. But it would be by and large the same. I use Webhosting provided by “Vodien”, so all my screenshots will be accordingly.
1. To get started, log in to your webhosting cPanel (Control Panel).
2. Look something that says ‘Quick Install’, ‘Popular Apps’, ‘Scripts”’or something similar on your cPanel homepage. Different webhosting provider would have different options.
In my Webhosting I have a option “Softaculous”, which is a software that allows easy WordPress Installation. If you have Hostgator Webhosting then you will have ‘Quick Install’ option under the Software/Service tab. For GoDaddy Webhosting you will see “Wordpress”, under the Popular Apps tab.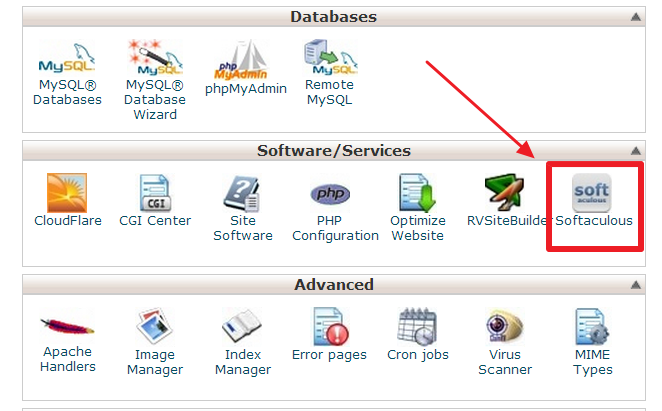
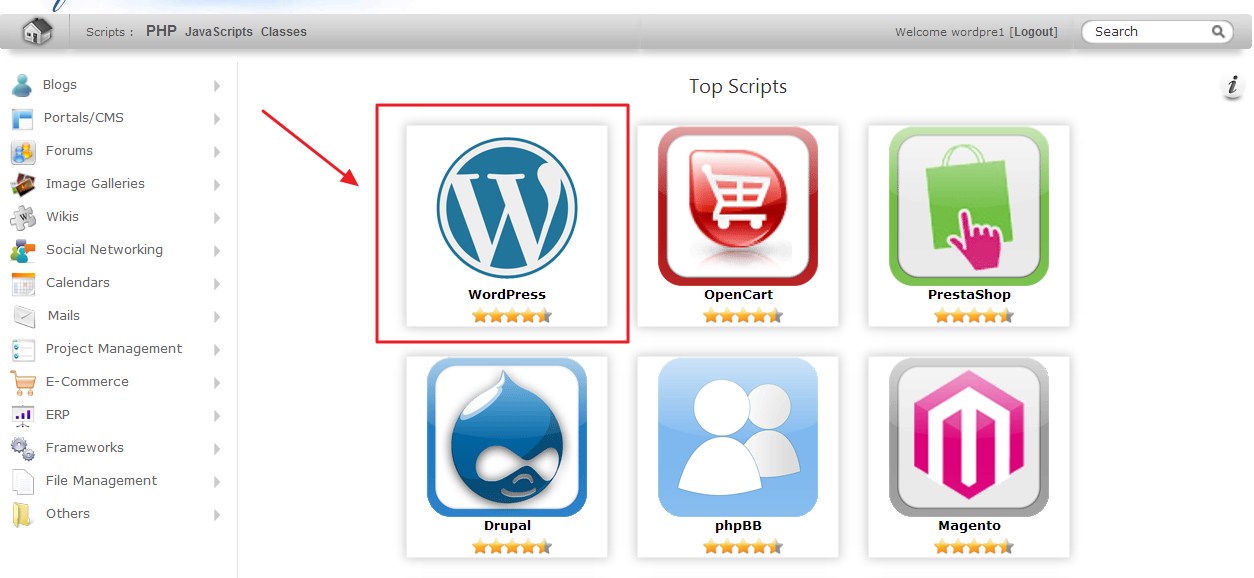
3. Look for “Wordpress” on the page that appears next and click on it.
4. Enter the details that are asked for on the next page.
- Database : You may be asked for “Database Name”. You may choose any name of your choice. In my webhosting the field is prefilled and can be changed too. (See the screenshot below)
- Make the “Directory” field blank if you want install wordpress in the main directory (you website will be accessed at www.yourdomain.com). If you want installation in some sub directory, then write the name of sub directory (your website will be accessed at ‘www.yourdomain.com/directory-name).’
- Enter the site details – ‘Site Name’ and ‘Site Description’. Click on an option to ‘Enable Multisite’. If you do not know what it is then leave it “unchecked”. (See the screenshot below)
- Enter the Admin Account details. You need to choose the username, password and email for your WordPress admin account. Using these login credentials you will be able to login to your wordpress backend. You must remember these login credentials. (See the screenshot below)
- Check “Limit Login Attempts” to allow only 3 login attempts. This will avoid span and unauthorized logins on your website.
- Check “Auto Upgrade” to upgrade to latest version of WordPress whenever available.
- Select “Automated Backup” option of your choice from the drop down menu. “Once a Day” is recommended. Taking backup of your website is highly essential.
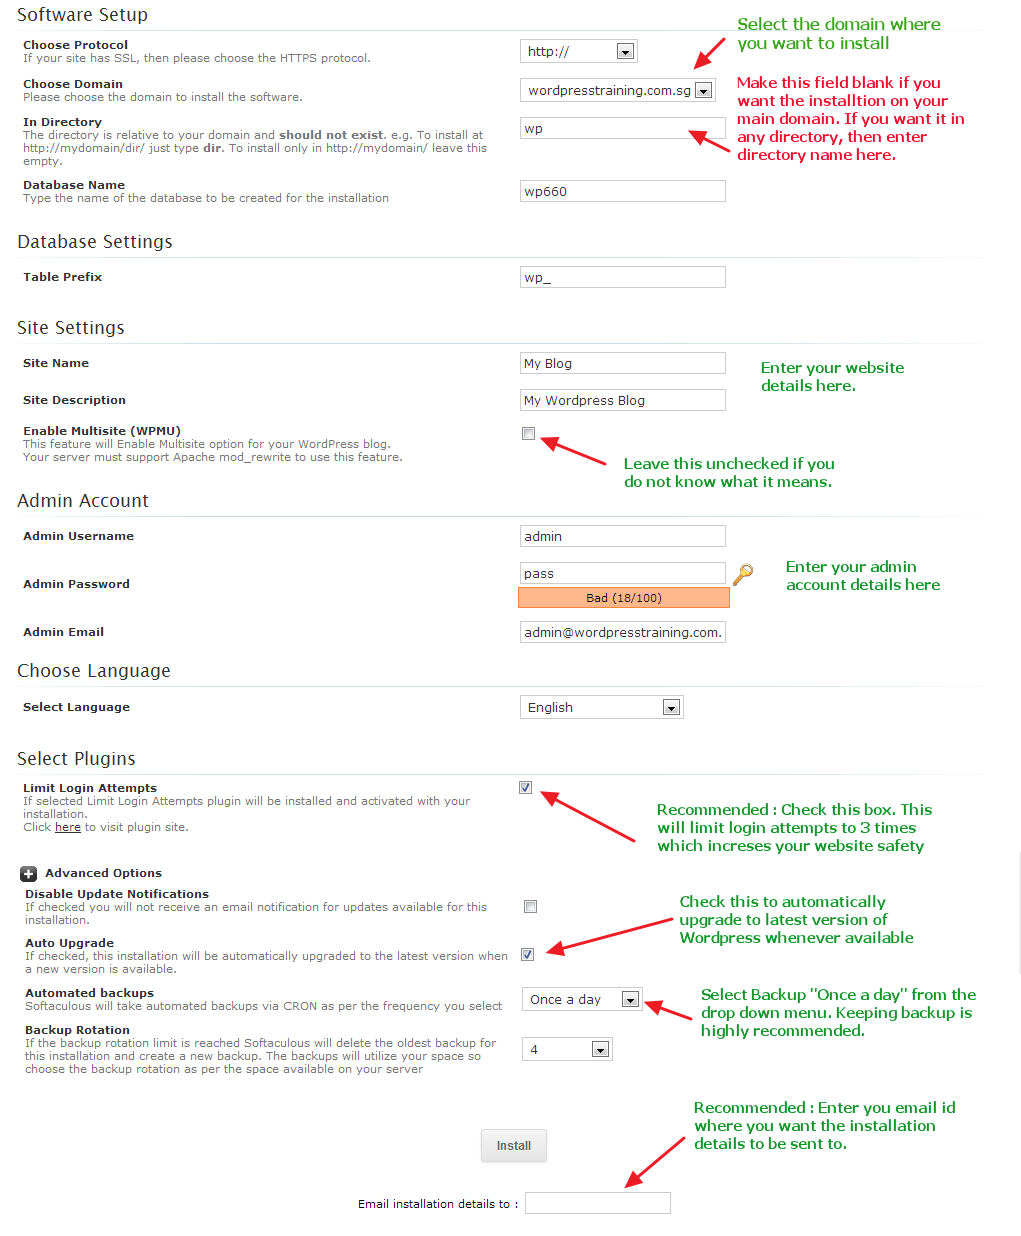
5. Then Click on “install” to complete the process.
6. After successful installation, check your email to see your WordPress Website details like database information, website backend and frontend URL and other details.
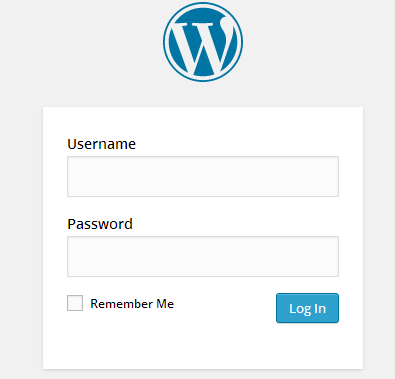
7. Type your WordPress Backend URL in your browser. It should be similar to this – www.mywebsite.com/wp-admin. You may check your admin email id for the backend URL.
8. Enter you login credentials on the login page and you’ll see your wordpress backend.
Alternate Method for installing WordPress
If your webhosting does not have One-Click install for wordpress then you may manually install it.
1. Login to your webhosting account.
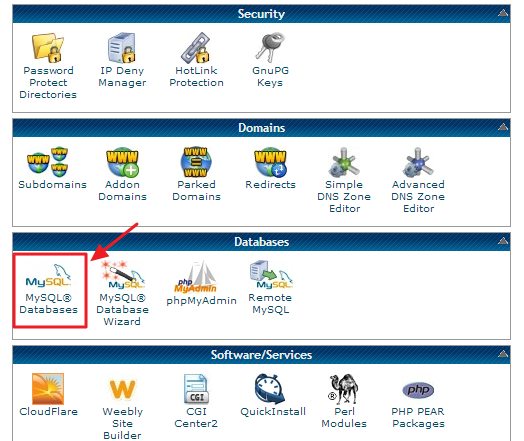
2. Under the “Database” Tab, click on “MySQL Database”.
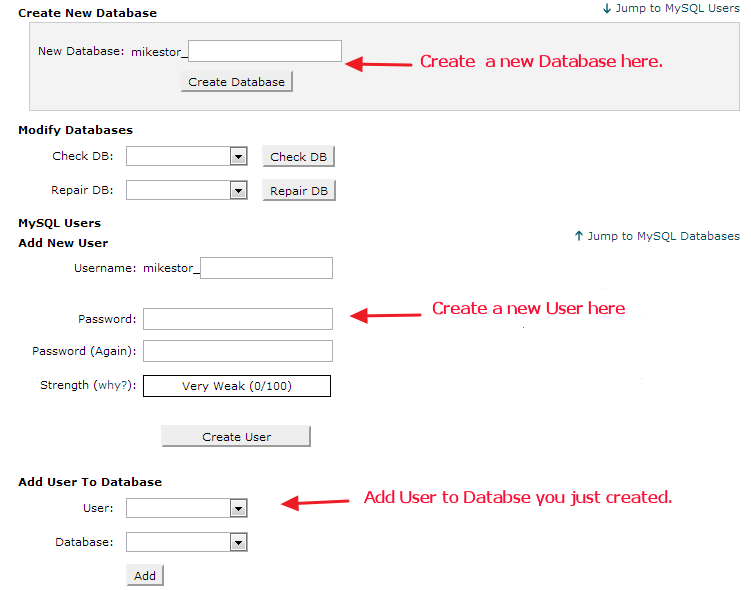
3. On the next page under the “Create a New Database” enter the database name of your choice.
4. Then under the “Add New User” tab create a new user. Note down the username and password.
5. Then under the “Add User To Database” tab you need to assign the user to the database you just created. Select the database and the user from their respective drop down list.
6. Now go to http://wordpress.org/download/ and download wordpress application zip file.
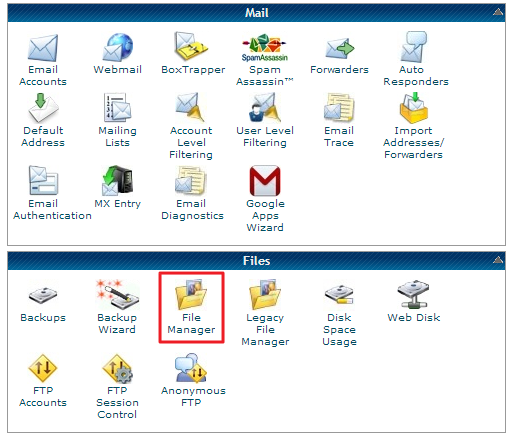
7. Now go to the File Manager of your webhosting. Upload the wordpress zip file in appropriate folder.
8. Now type your website/directory URL in the browser. The installation setup will show up.
9. Follow the installation step by step as prompted. Enter the details of the database you have created in step 3 and 4.
10. Enter your WordPress site details like Site Title, Site Description, etc when asked for.
11. Enter the Admin Account details when asked for. Remember this login details since you need them to login to wordpress backend.
12. Upon successful installation check your email you choose for admin account in the step 11. Find the backend URL from the email and click on it. It should be similar to www.mywebsite.com/wp-admin. Enter your login details on the page that appears.
13. There you are viewing your wordpress backend panel.
Note: It you have any issues regarding WordPress Installation then contact your WebHost provider to guide you through the installation.
If you are keen in joining the WordPress workshop, you can take a look at: https://wordpresstraining.com.sg/