What Are The Functions Of Editor In WordPress?
The WordPress Editor
The WordPress content editor is almost like MS Office editor or any other standard editor. But still there are few things that you need to know to make it easy to use.
- Editor Modes :
The WordPress Editor has two modes – Visual and Text Mode.
 As the name suggests, visual mode will display formatted content with media. The exact view on the frontend would change because the width of the Editor panel and the frontend content area are different.
The Text mode shows the HTML codes of your content. If you want to edit anything using HTML, then use this.
If you ever want to add HTML code to your post/page, then use only Text Mode. Placing the HTML code in Visual Mode will simply display the code as it is on the frontend and will not be formatted.
- Media:
Adding media to the content is no big deal, but placing the media at correct position is what can be a little tricky.
After having added the media, select the media and hover the mouse over the media to see a “edit” option on the top left and click on it.
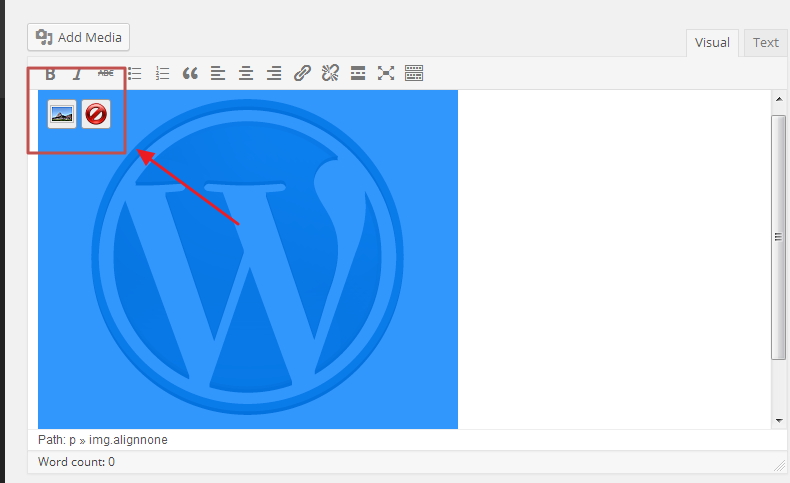
Select proper alignment. After selecting alignment, there will a block showing the preview.
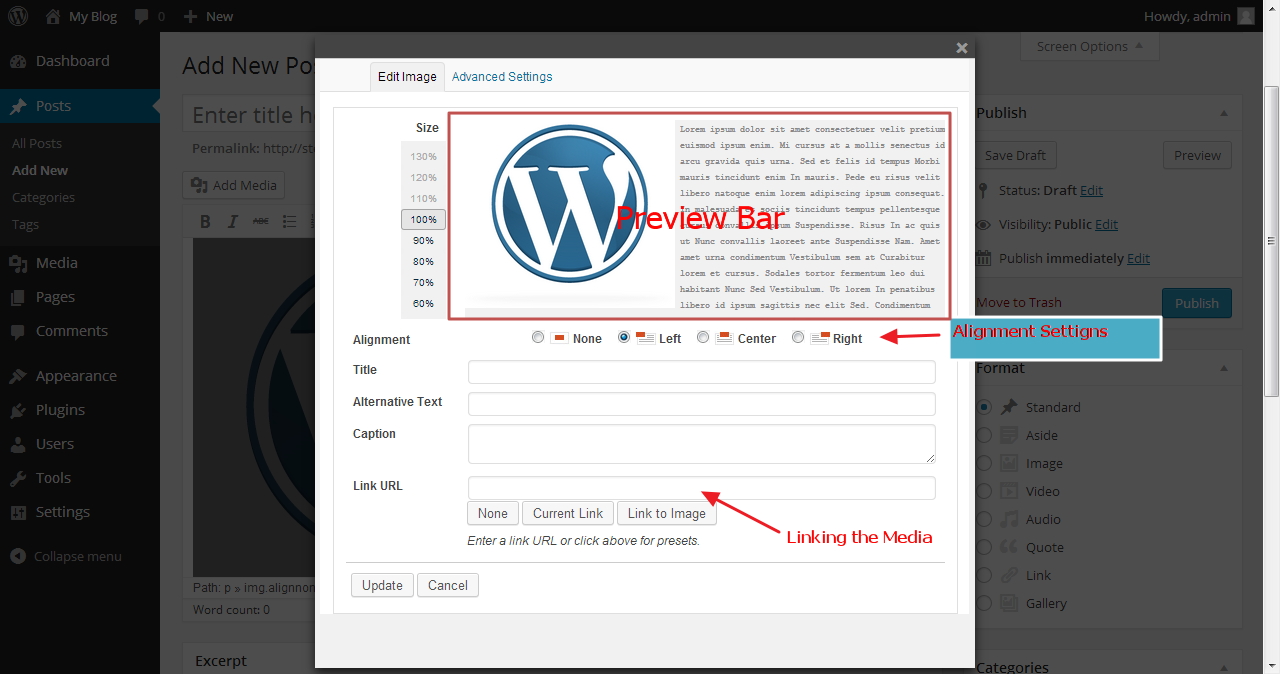
You can edit the Links, Caption, Title, etc.
Under the “Advanced Settings” tab, you can specify the width and height of the image.
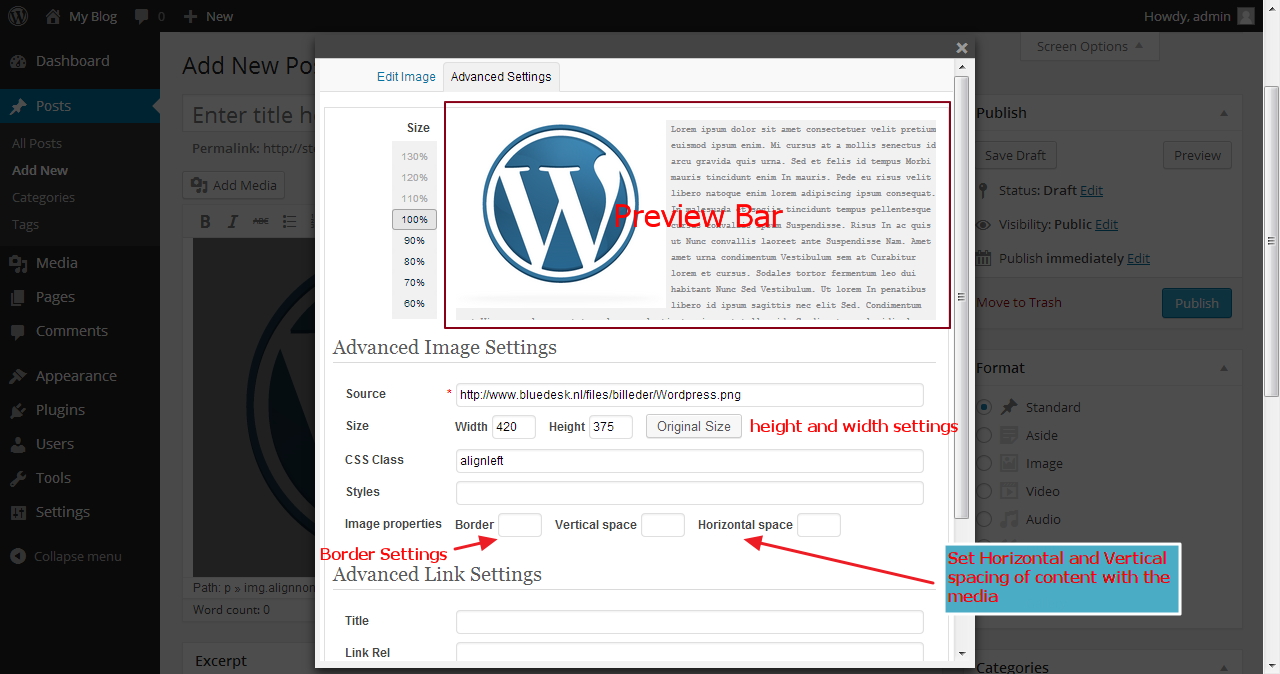 If you want some space between the image and the content on its side (know as padding) then you may enter some value in the “Vertical Space” and “Horizontal Space” fields (Recommended value is 10px).
Choose border if you wish. The values allowed are 1, 2, 3…….. and so on.
You can select the “Target” option, to open the image in a new tab when someone click on it. It is recommended you select this option.
Adding Pages and Post Categories to Menu Bar
You created Post and Pages. But they do not automatically show up in the Menu Bar. Although in many themes the new pages are automatically added to the menu bar, but in most themes that has to be done manually.
To add the Pages and Post Categories in the menu bar follow the steps below:
- Go to Appearance —- > Menus.
- You will see a button – ‘Create a New Menu’ and click on it.
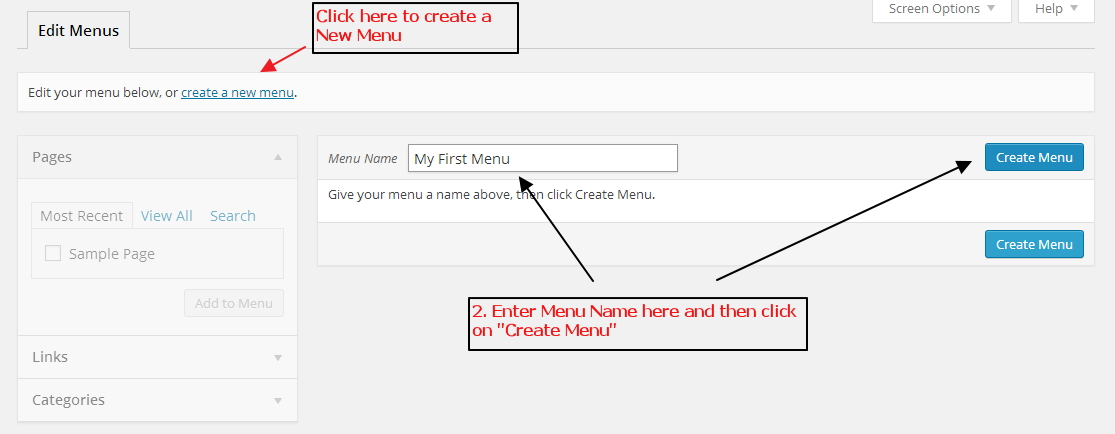
- On the left you will find options under different categories viz. Pages, Links, Categories, etc. Choose appropriate options and click on “Add to Menu”.
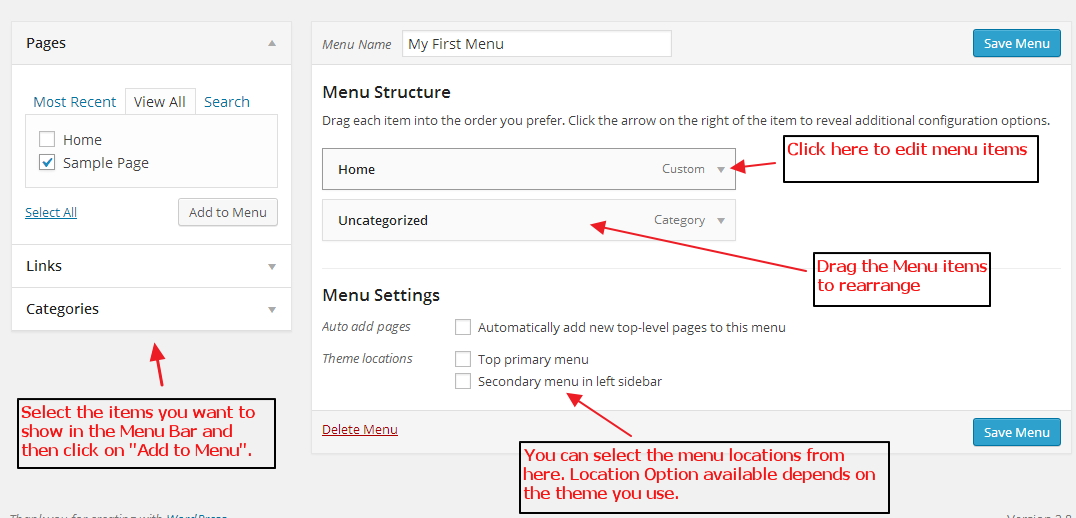
- You can edit any menu button by clicking on the dropdown icon on the right of the menu option.
- You can rearrange the menu options simply be dragging.
- After you are done, click on “Save Menu”.
Positioning the Menu Bar
After having created the Menu Bar we need to position it on our website. The position options available will depend on the theme you are using. Different theme providers have different options to position the Menu Bar.
To position the Menu Bar you created, follow the steps below:
- Go to Appearance —- > Menus.
- Click on Manage Location on the very top of the page.
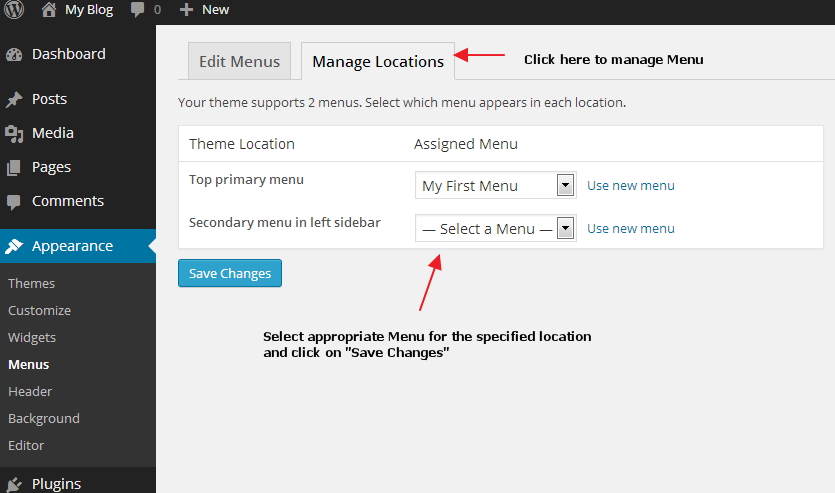
- Select appropriate Menu name for the located available.
- Click on “Save Changes” to save.
- You can now view the front-end of your website and see the menu bar placed it its position.